Account Setup – Getting Started Guide
Introduction
Welcome to SAS Cleaning Suite.
Before you begin managing projects, staff, schedules, clients, and daily operations, you’ll first need to set up your company account.
This guide walks you through the complete setup process step by step in a simple and beginner-friendly way. Whether you’re using the platform for the first time or have little technical experience, this guide will help you get started quickly and confidently.
After your company subscribes to SAS Cleaning Suite or books a demo, the SAS Cleaning Suite team will create your company account and send you your login details.
You will receive:
- Portal login URL
- Username or registered email address
- Temporary password
Once you log in for the first time, you can update your password, customize your settings, and prepare your portal for daily business operations.
What You’ll Learn
In this guide, you’ll learn how to:
- Log in for the first time
- Change your temporary password
- Set up your company profile
- Add your first branch
- Configure system preferences
- Upload company branding
- Add team members
- Prepare your portal for daily operations
Account Setup Workflow
Most companies complete setup using this workflow:
Company Registration → Login Credentials Received → First Login → Password Update → Company Setup → Branch Setup → System Preferences → Team Setup → Ready to Use
Following this setup process helps ensure your portal is secure, organized, and ready for daily use.
1. Receive Your Login Credentials
Once your company account has been created by the SAS Cleaning Suite team, you will receive your login details by email.
The email typically includes:
- Portal login link
- Username or registered email address
- Temporary password
Important Security Note
Your temporary password is only meant for first-time access.
For security reasons, it is strongly recommended that you change your password immediately after logging in.
2. Log In to the Admin Portal
After receiving your credentials, you can log in to the Admin Portal.
Steps to Log In
- Open the login link provided by the SAS Cleaning Suite team
- Enter your username or email address
- Enter your temporary password
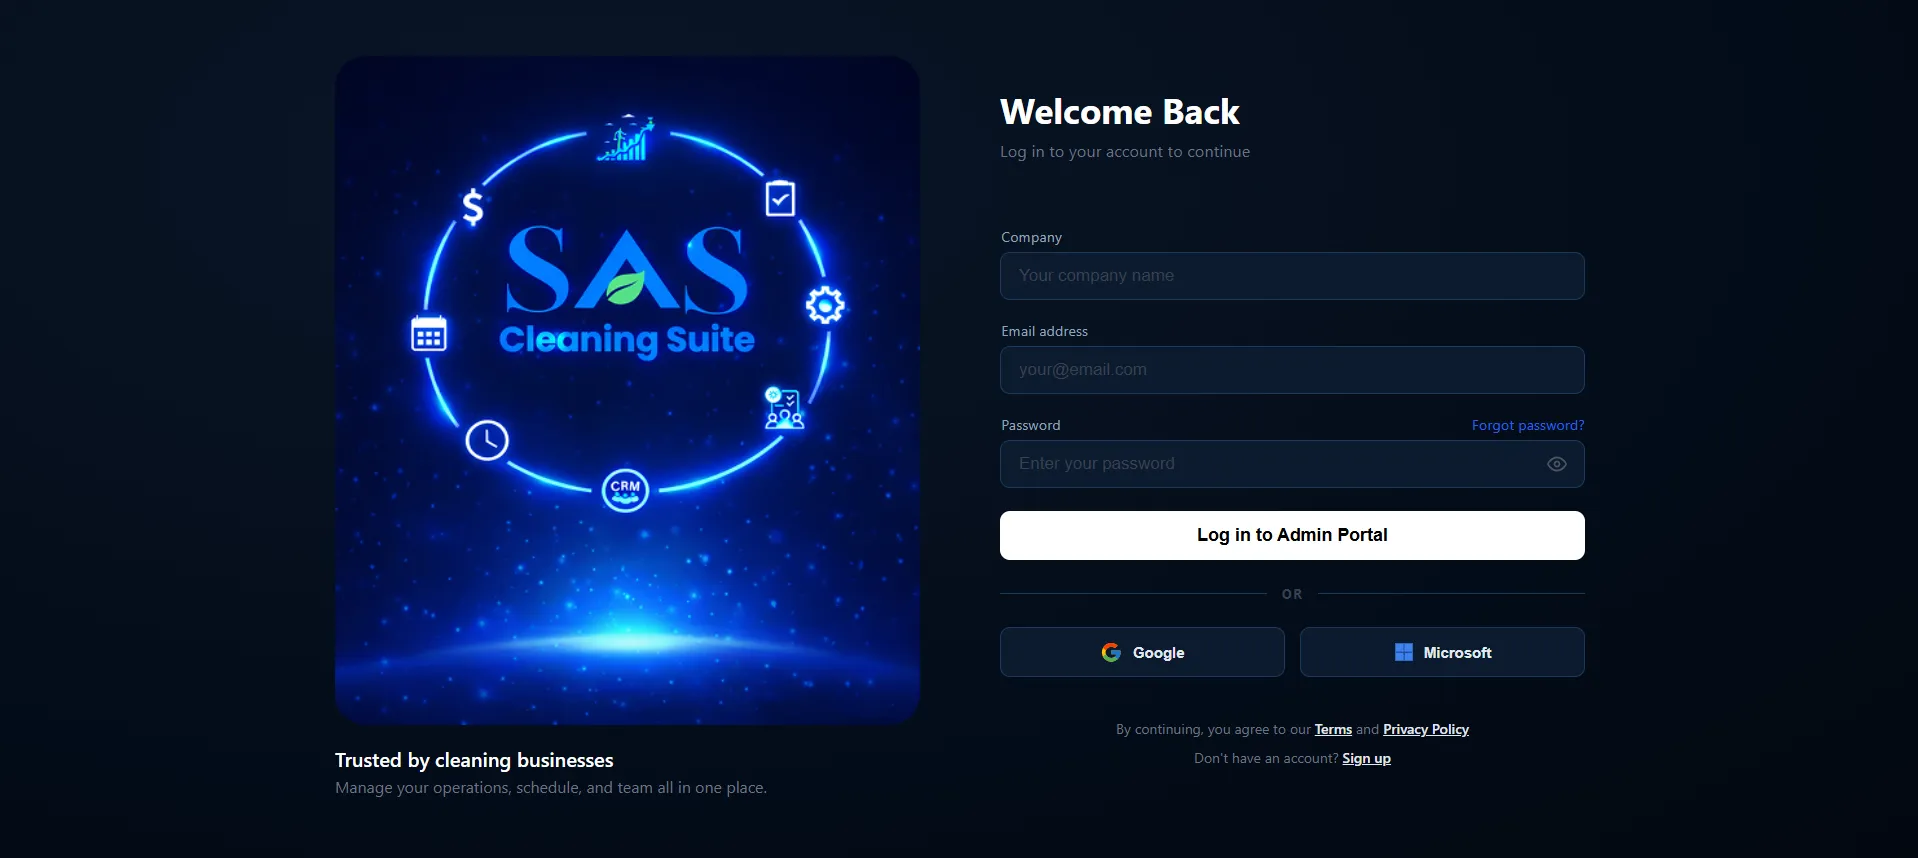
- Click “Login”
After logging in successfully, you will be taken to the Admin Dashboard.
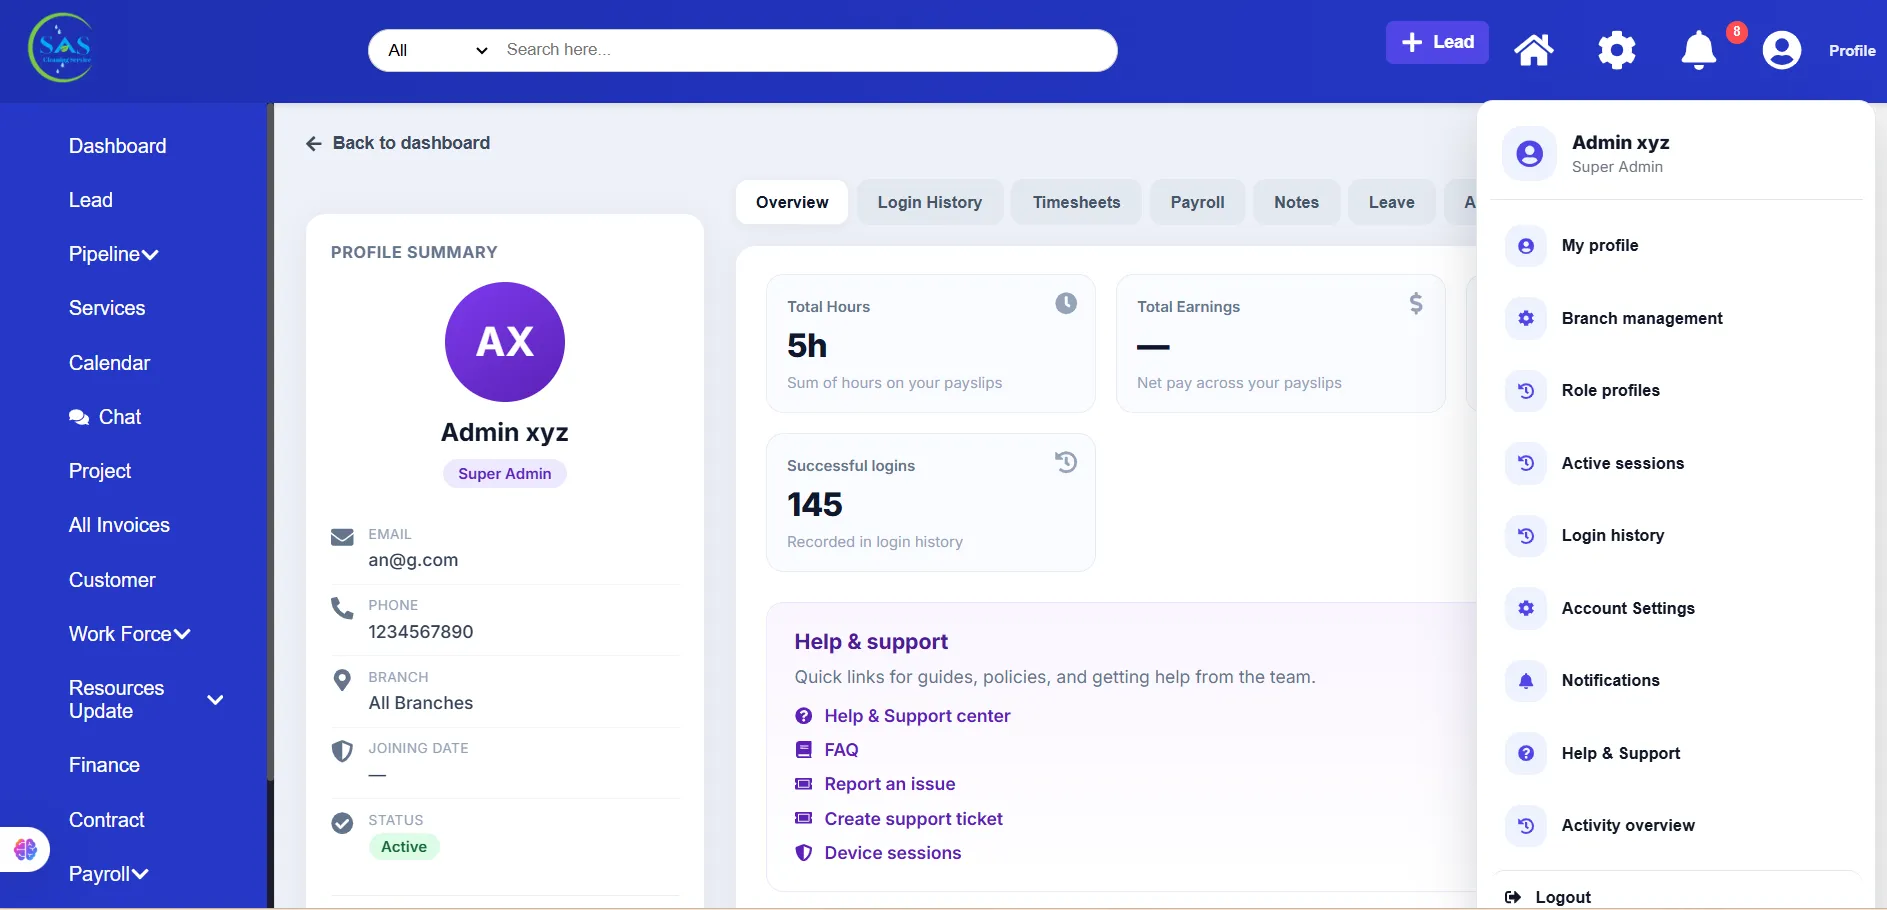
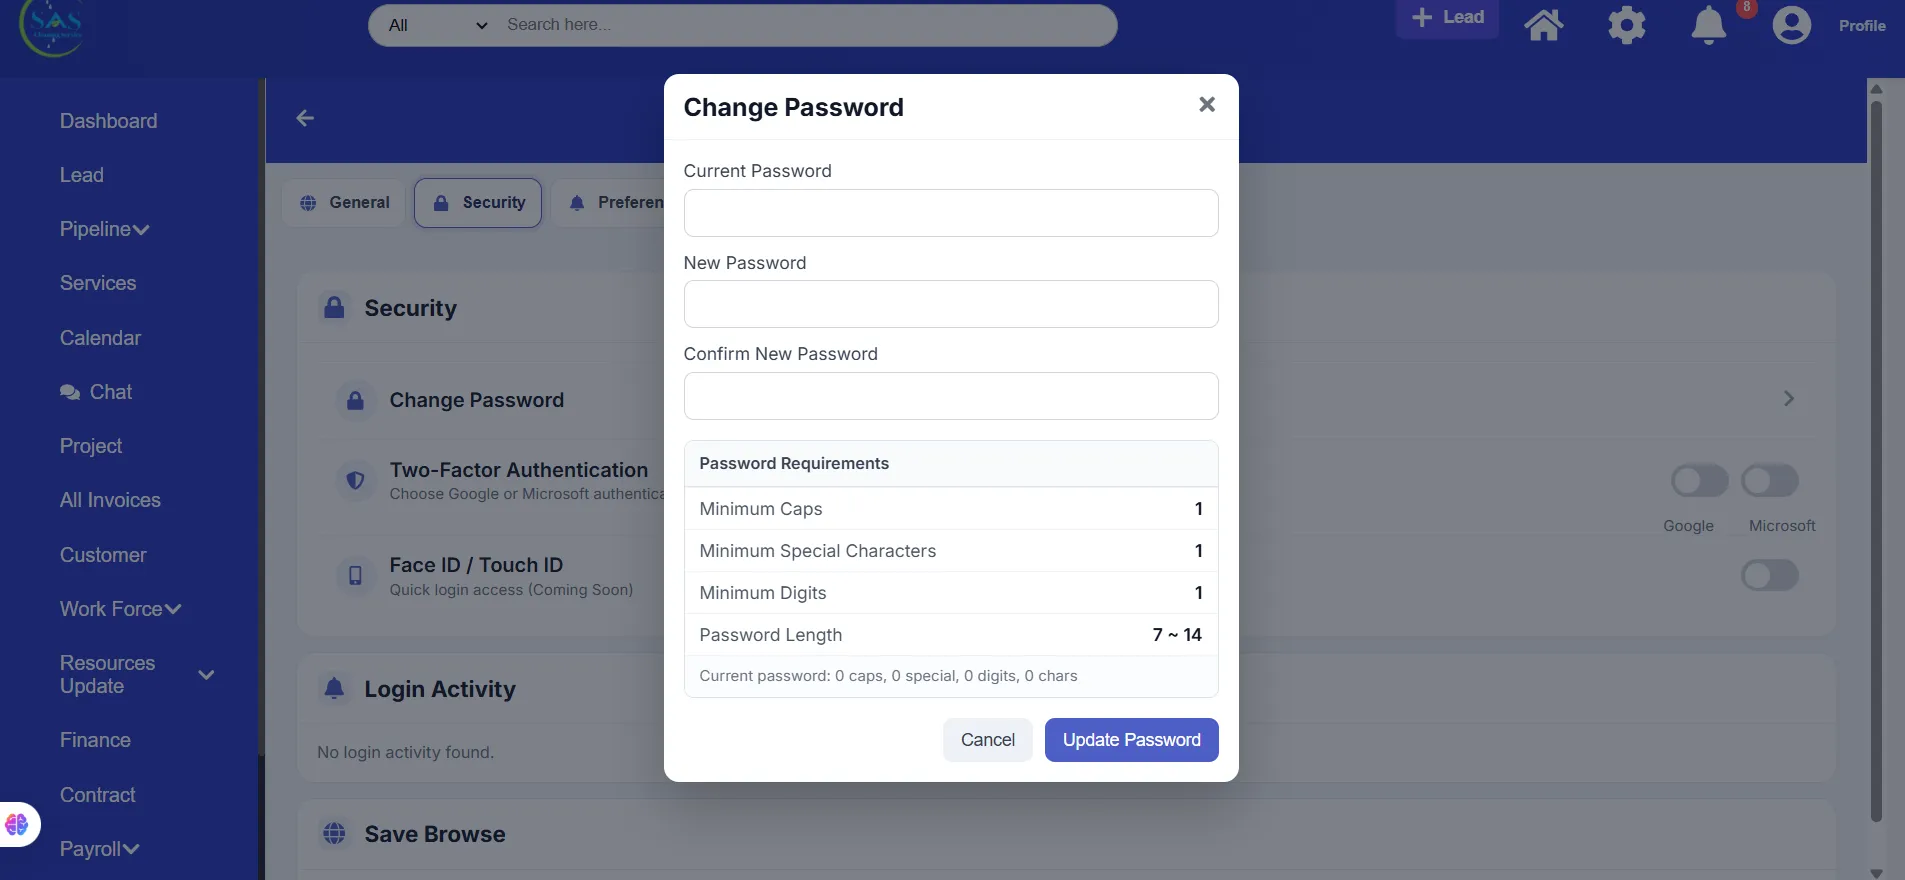
3. Change Your Password
Updating your password helps keep your company account secure.
Steps to Change Your Password
- Open your profile menu
- Go to “Account Settings”
- Select “Security & Password”
- Enter your new password
- Confirm the password
- Click “Save Changes”
Recommended Password Tips
For better security, your password should include:
- Uppercase letters
- Lowercase letters
- Numbers
- Special characters
Example
Admin@123
Avoid Weak Passwords Like
123456passwordcompanyname123
Using a strong password helps protect your company data and user accounts.
4. Set Up Your Company Profile
Your Company Profile stores your business information inside the system.
Keeping this information up to date helps improve communication, branding, and document accuracy.
Steps to Configure Your Company Profile
- Open “Settings”
- Go to “Company Profile”
- Enter your company information
- Click “Save”
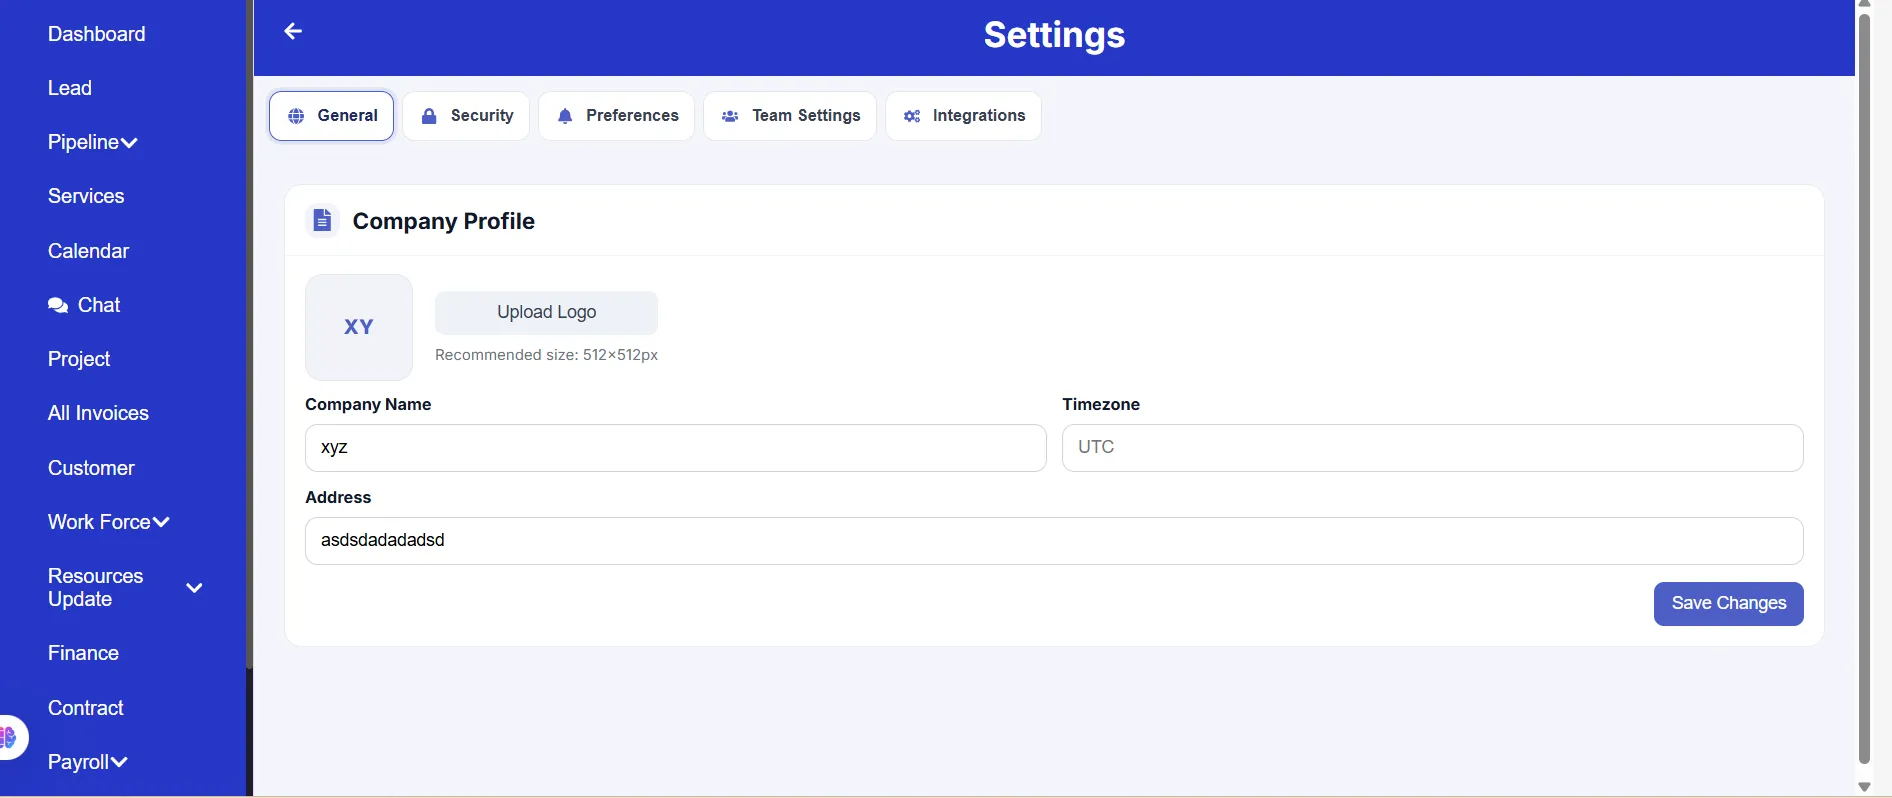
Information You Can Add
- Company name
- Business email address
- Phone number
- Office address
- Website
- Company logo
5. Upload Company Branding & Logo
Adding your branding creates a more professional experience for both staff and clients.
You Can Upload
- Company logo
- Brand colors
- Business information
Where Branding May Appear
Your branding may appear in:
- Client Portal
- Reports
- Quotations
- Invoices
- Login screens
Using clear and professional branding helps strengthen your company identity.
6. Add Your First Branch
Branches help organize your business locations, teams, and operations.
If your company works across multiple locations, you can manage everything from one centralized system.
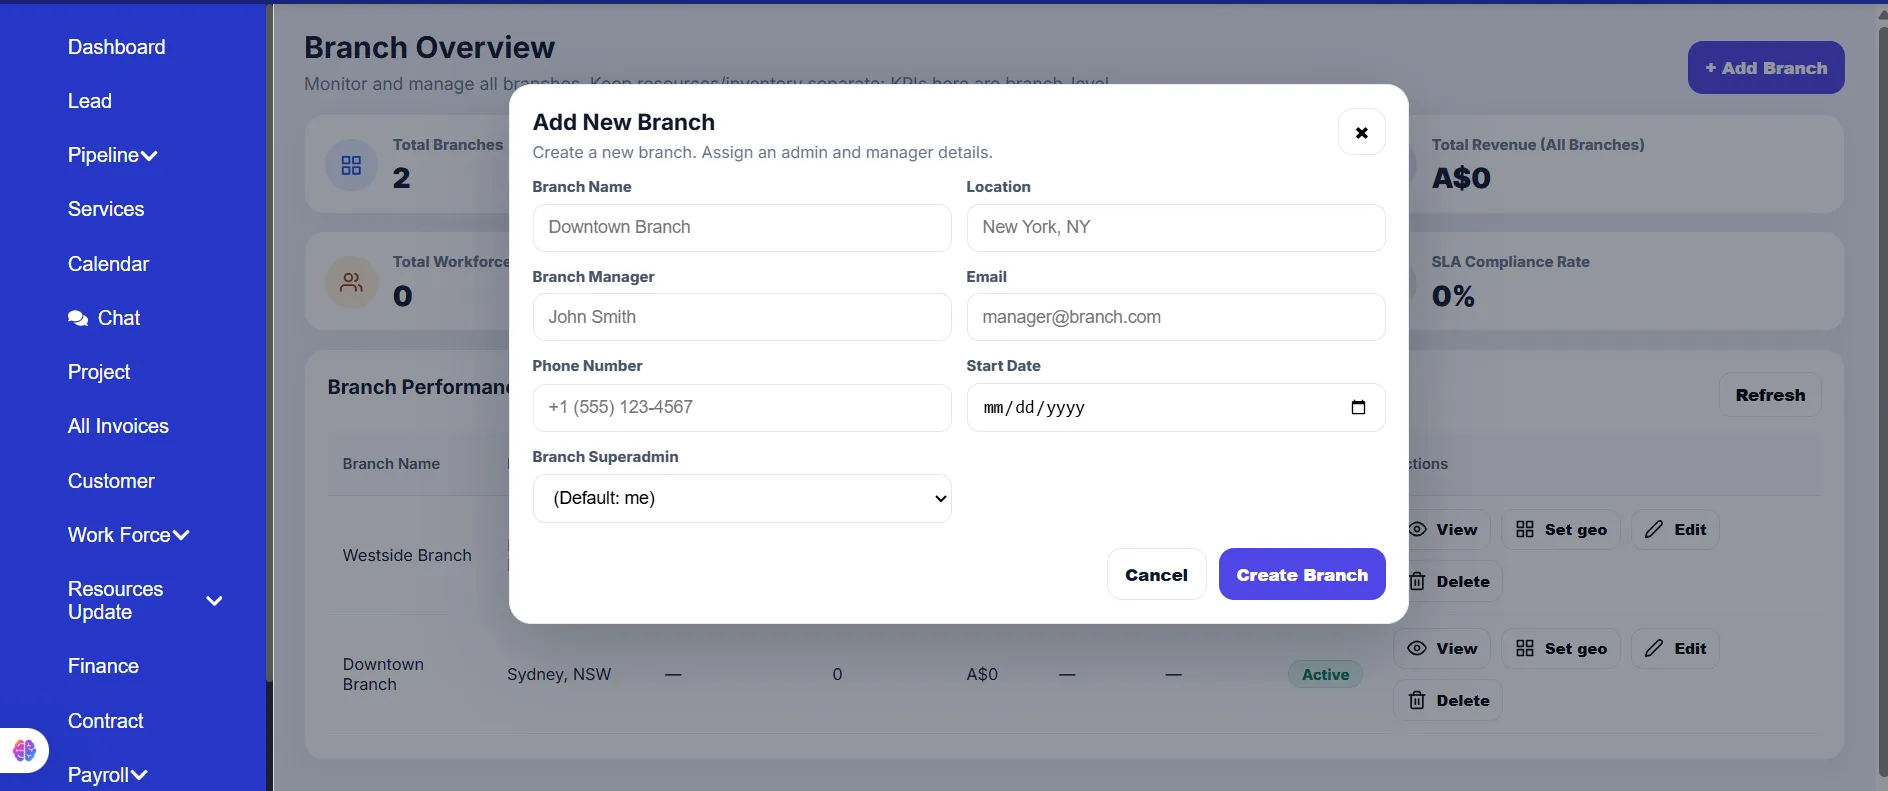
Steps to Add a Branch
- Open “Branch Management”
- Click “Add New Branch”
- Enter branch details
- Save your changes
Branch Information May Include
- Branch name
- Address
- Contact number
- Assigned manager
- Working hours
Keeping branch details accurate helps improve scheduling and staff management.
7. Configure Basic System Preferences
System Preferences allow you to customize how SAS Cleaning Suite works for your business.
Common Settings You Can Configure
- Time zone
- Currency
- Notification preferences
- Regional settings
- Date and time format
These settings help ensure accurate scheduling, reporting, and notifications.
8. Configure Notification Settings
Notifications help keep you informed about important business activity.
You Can Receive Alerts For
- New leads
- Project updates
- Invoice payments
- Staff requests
- Schedule changes
- Chat messages
Steps to Configure Notifications
- Open “Settings”
- Select “Notifications”
- Turn alerts ON or OFF
- Save your changes
Customizing notifications helps you stay updated without unnecessary distractions.
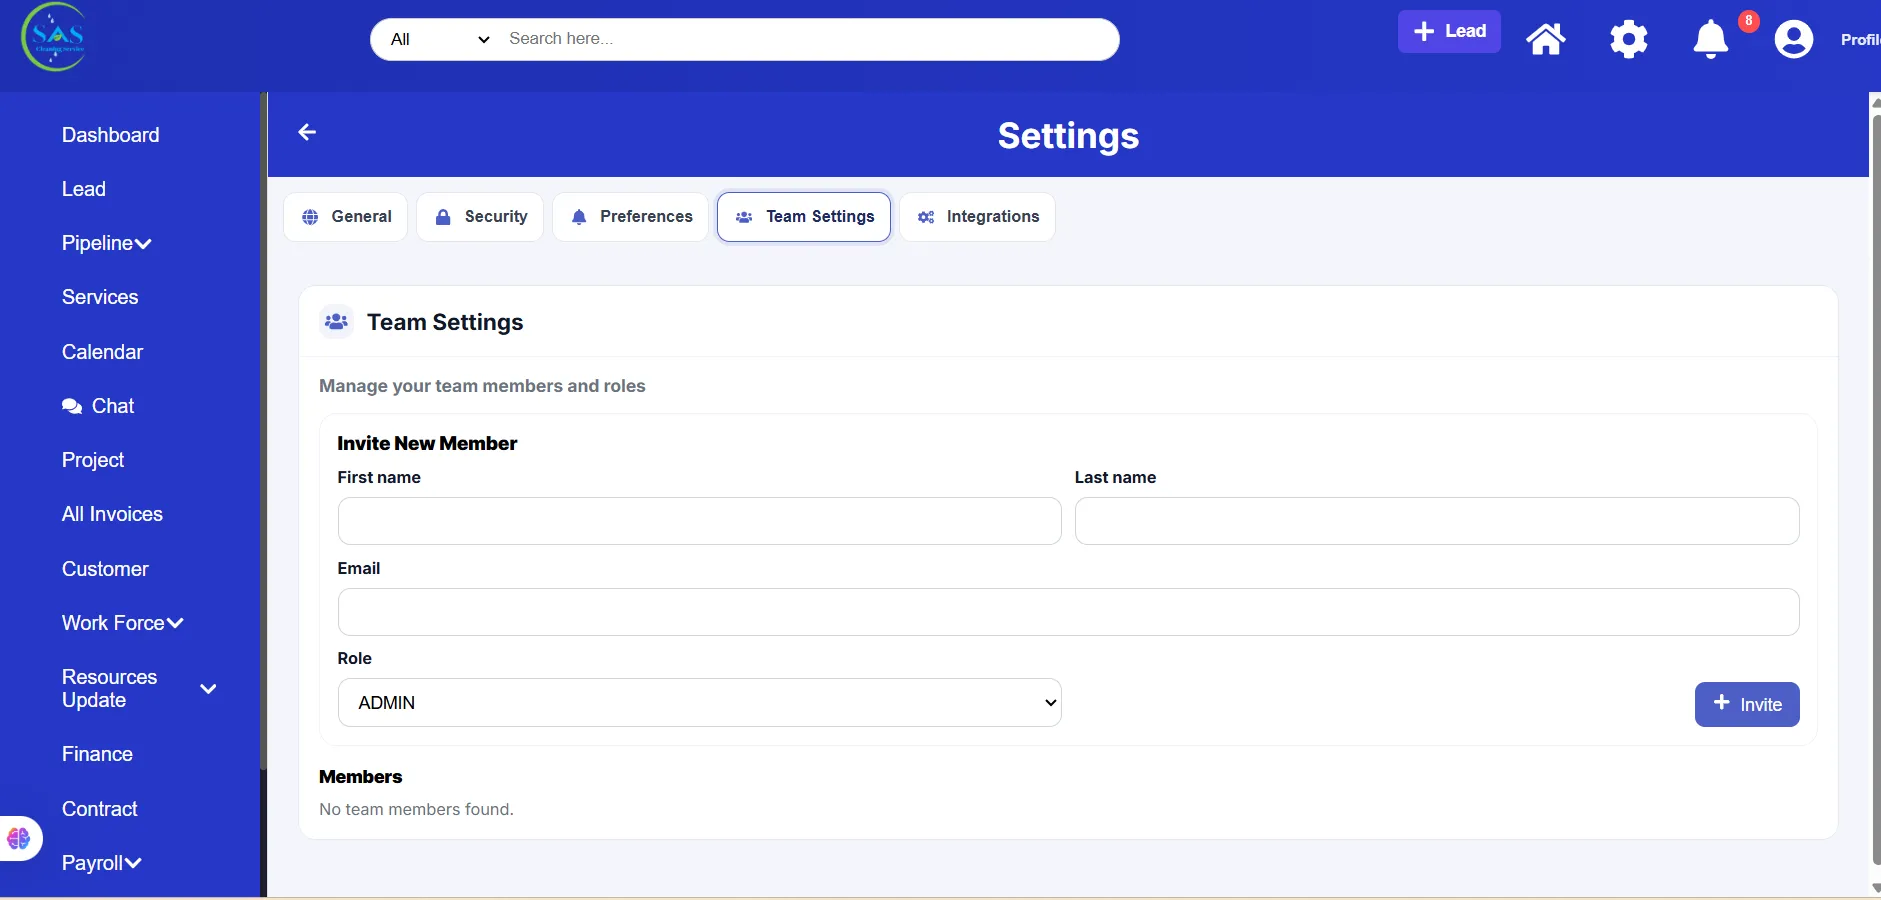
9. Add Your First Team Members
Once your setup is complete, you can invite your staff members into the system.
Steps to Add Team Members
- Open “Team Settings”
- Click “Invite Member”
- Enter staff information
- Assign a role
- Send the invitation
Available Roles May Include
- Super Admin
- Manager
- Cleaner
- Contractor
- Finance Staff
Each role includes different permissions and access levels.
Assigning the correct role helps keep your system organized and secure.
10. Review Your Dashboard
Before starting daily operations, review your dashboard to make sure everything is configured correctly.
Check the Following
- Company information
- Branch setup
- User access and permissions
- Notification settings
- Dashboard widgets
- Team roles
This final review helps ensure your system is fully ready for use.
Common Setup Mistakes to Avoid
Avoiding common setup mistakes can save time and prevent future issues.
Common Errors
- Using incorrect email addresses
- Forgetting to change the temporary password
- Not assigning branches correctly
- Leaving important notifications disabled
- Assigning incorrect user permissions
- Uploading unclear or low-quality logos
Double-checking your setup now can help avoid operational problems later.
Daily Workflow Example
Here’s an example of a typical first-time admin setup process:
- Receive login credentials from SAS Cleaning Suite
- Log in to the Admin Portal
- Change the temporary password
- Configure the company profile
- Upload the company logo and branding
- Add your first branch
- Configure notification settings
- Add team members
- Review the dashboard setup
- Start managing operations
Following a structured setup process helps ensure everything is ready from day one.
Best Practices
To keep your account secure and your portal organized:
- Change your password after your first login
- Keep company information updated
- Use strong passwords
- Configure notifications properly
- Assign correct staff roles and permissions
- Review settings regularly
- Upload professional company branding
- Keep branch information organized
Good setup habits help create smoother daily operations.
Conclusion
Setting up your SAS Cleaning Suite account correctly helps your business operate more efficiently from the very beginning.
By following this guide, you can:
- Secure your company account properly
- Organize business operations more effectively
- Manage branches and staff efficiently
- Customize your system settings
- Prepare your portal for daily use
Once your setup is complete, you’ll be ready to manage your cleaning business more confidently and efficiently using SAS Cleaning Suite.