Admin Portal – Complete Support Guide
Introduction
The Admin Portal in SAS Cleaning Suite is your main workspace for managing daily business operations. From handling leads and creating projects to managing staff, schedules, inventory, payroll, and support requests — everything can be controlled from one central location.
This guide is designed to be simple, practical, and easy to follow, even for first-time or non-technical users.
Whether you manage a small cleaning team or a large operation, the Admin Portal helps you stay organized, save time, and keep your business running smoothly.
What You’ll Learn
In this guide, you’ll learn how to:
- Manage leads and convert them into projects
- Monitor operations, schedules, and staff activity
- Manage cleaners, contractors, and managers
- Track inventory and cleaning supplies
- Handle invoices, payroll, and financial records
- Monitor project communication and progress
- Use support and training tools effectively
How the Admin Workflow Works
Most operations inside the Admin Portal follow this workflow:
Lead Added → Lead Verified → Sales Discussion → Project Created → Team Assigned → Work Tracked → Reports Reviewed → Invoice & Payment Processed
Understanding this workflow will help you manage projects more efficiently from start to finish.
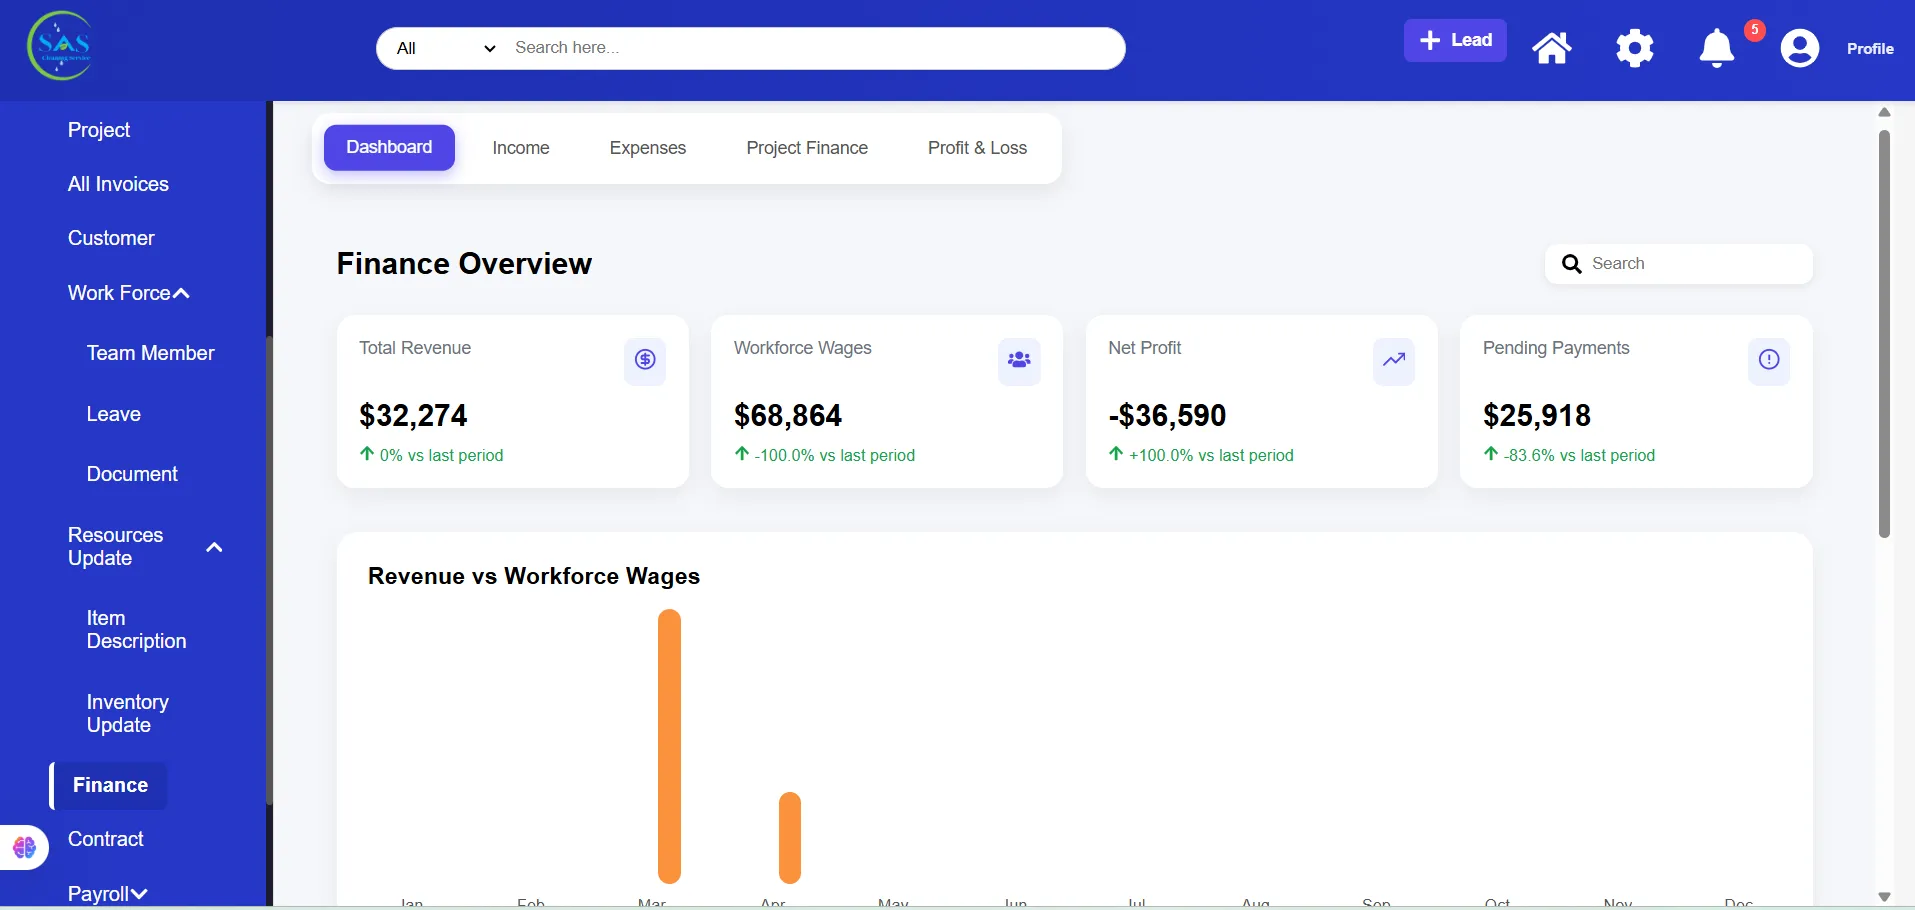
1. Dashboard (Your Business Command Center)
The Dashboard is the first screen you see after logging in. It gives you a quick overview of your business performance, team activity, and ongoing operations.
A. KPI Summary Cards
Quickly view important business metrics such as:
- Total revenue
- Active projects
- Completed jobs
- Team performance overview
These summary cards help you understand business performance at a glance.
B. Activity & Performance Overview
The dashboard also includes charts and reports to help you monitor:
- Project distribution
- Staff activity
- Recent operations
- Team performance trends
This helps you make faster and better business decisions throughout the day.
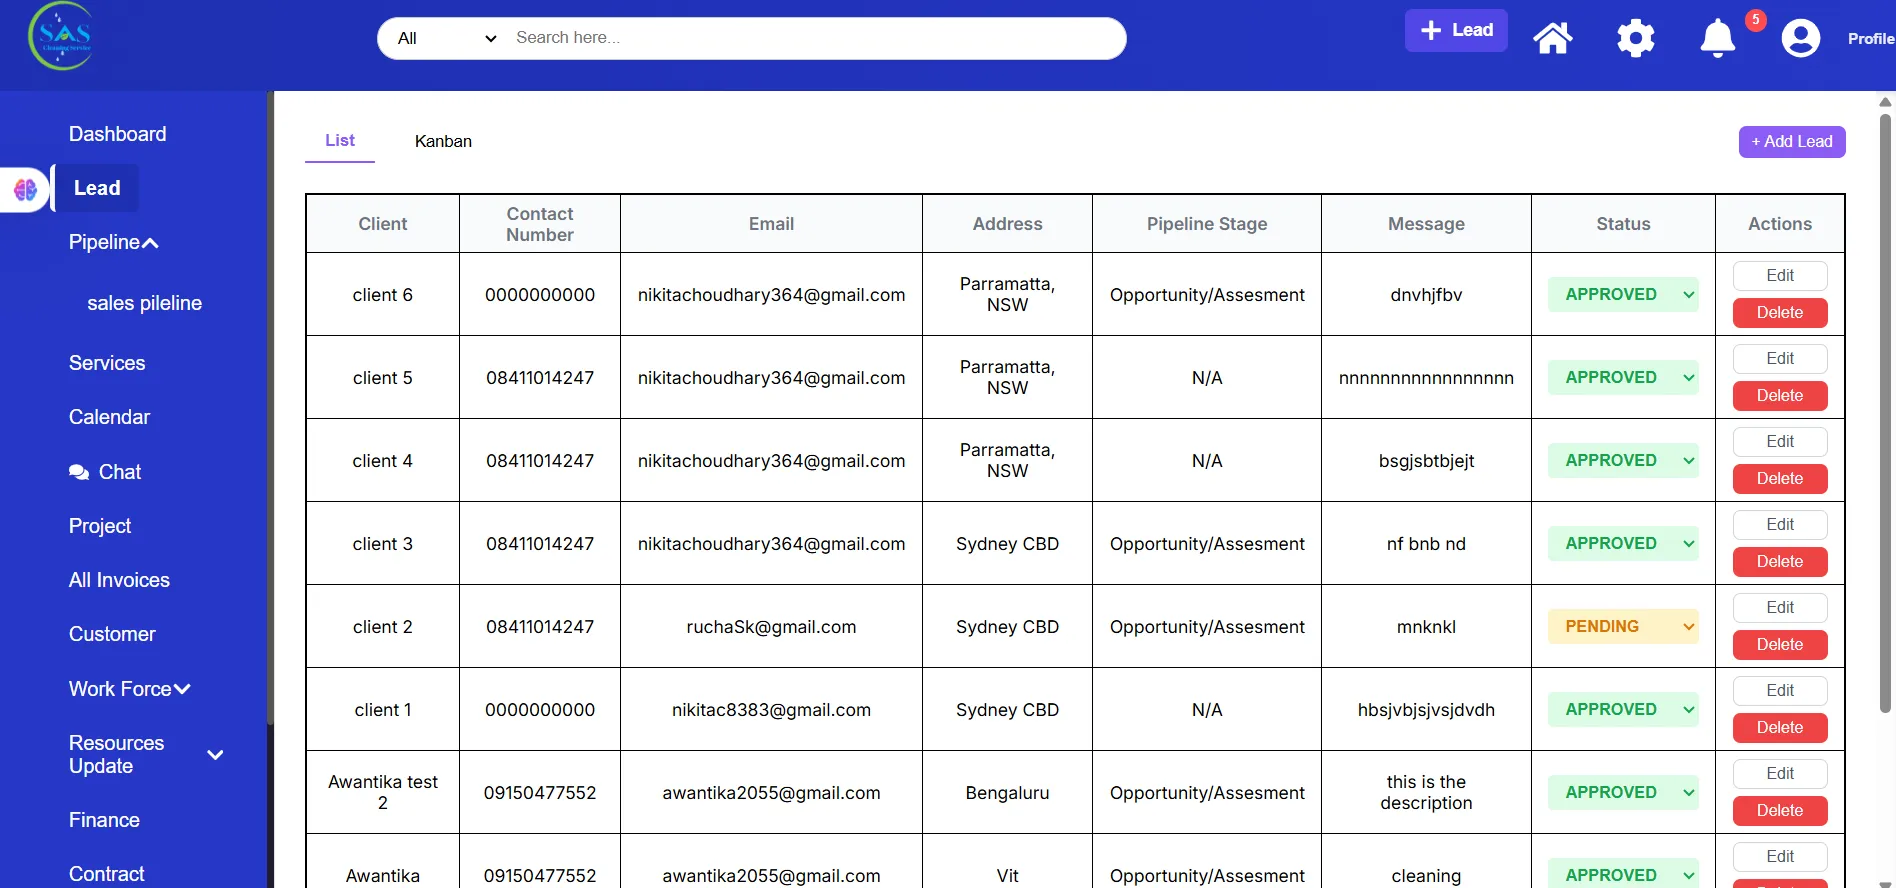
2. Lead Management
The Lead Management section helps you organize potential customers before they become active clients.
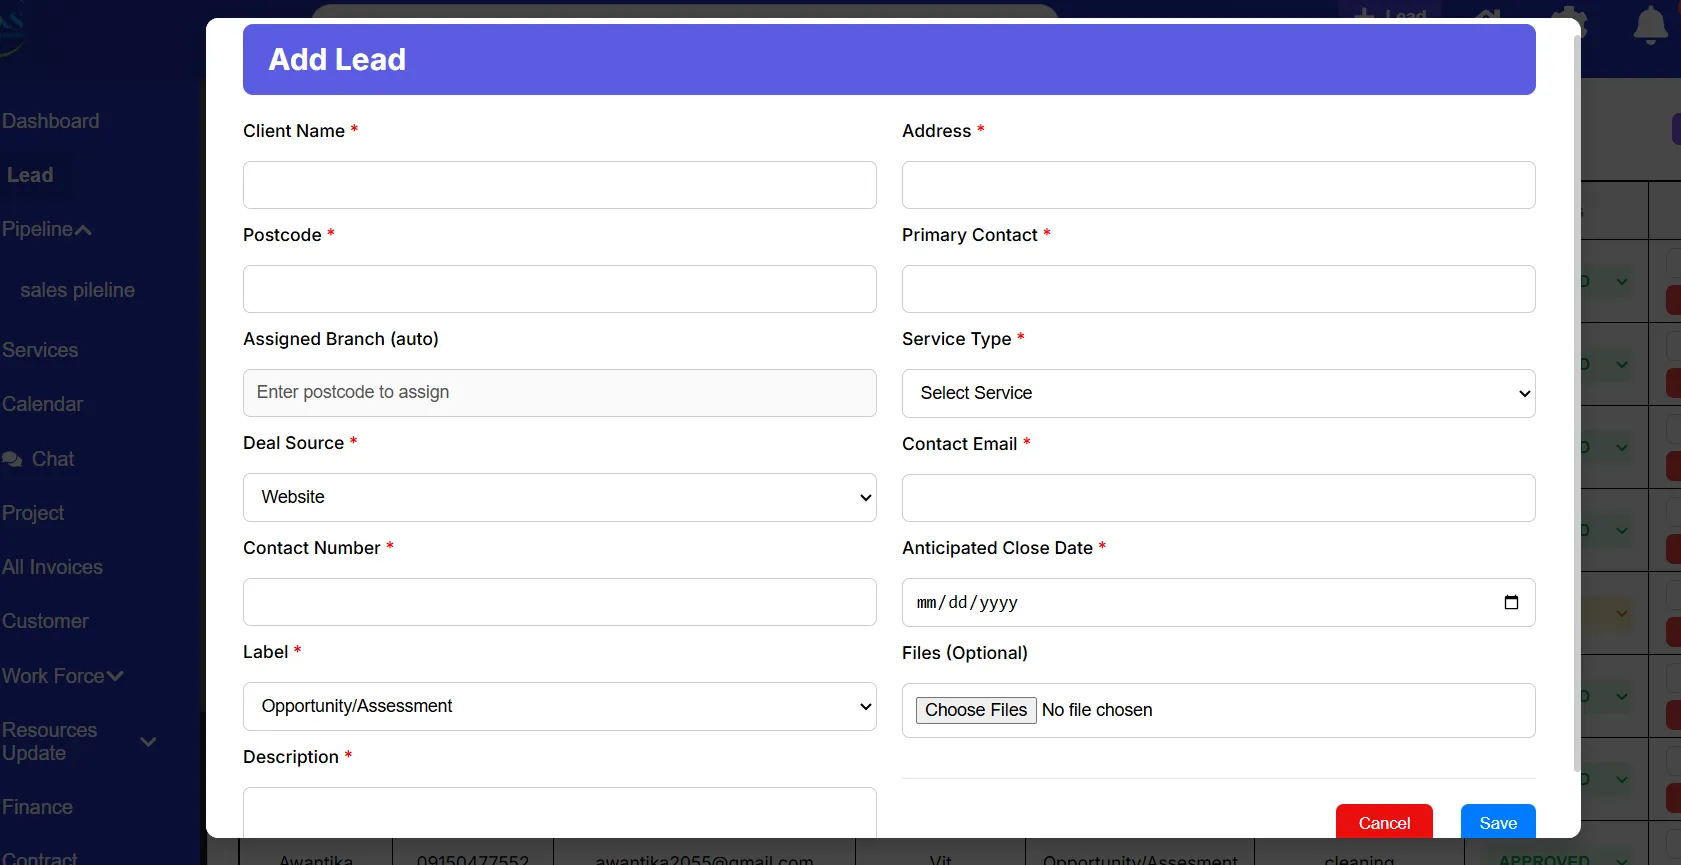
A. Add a New Lead
Navigation Path
Dashboard → Lead Management → Add Lead
Steps to Add a Lead
- Click “Add Lead”
- Enter customer information:
- Name
- Phone number
- Email address
- Cleaning requirements
- Click Save
The new lead will now appear in your lead list.
B. Lead Views
You can manage leads using two different layouts depending on your preference.
List View
The List View displays leads in a table format.
Best for:
- Sorting information
- Searching quickly
- Filtering records
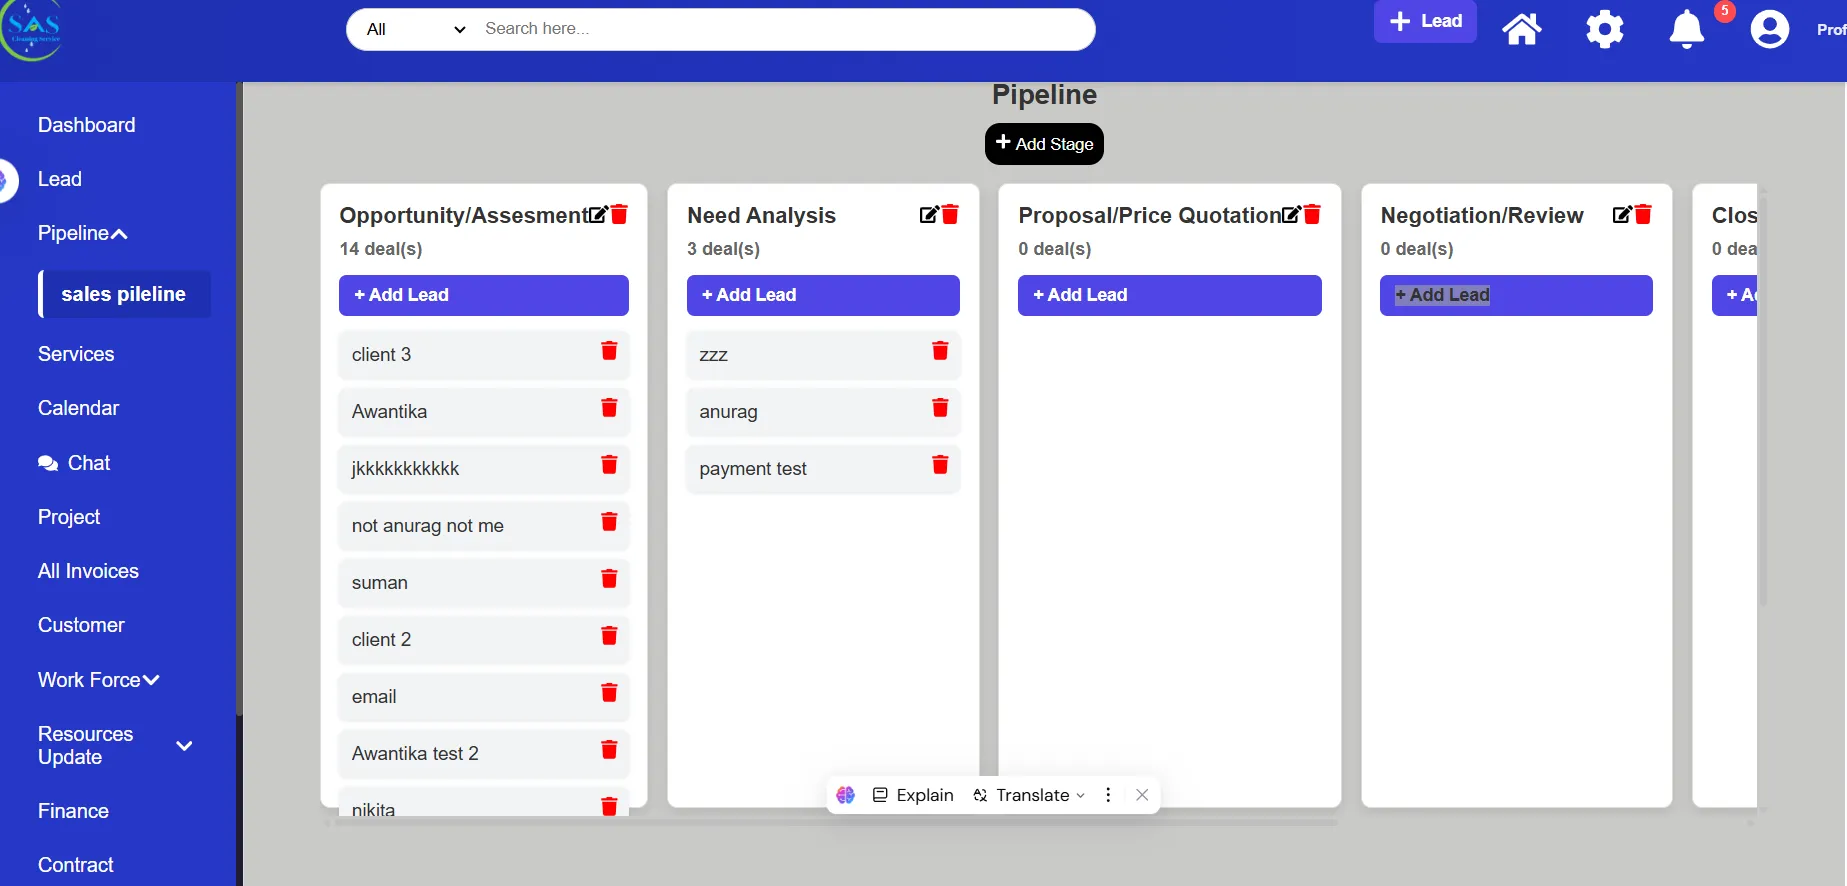
Kanban View
The Kanban View displays leads as movable cards.
You can:
- Drag and drop leads between stages
- Track sales progress visually
- Manage follow-ups more easily
This view is especially useful for sales tracking.
C. Verify Leads
Before moving a lead into the sales process:
Open the lead profile
- Review customer details carefully
- Click “Verify”
Once verified, the lead moves into the Sales Pipeline.
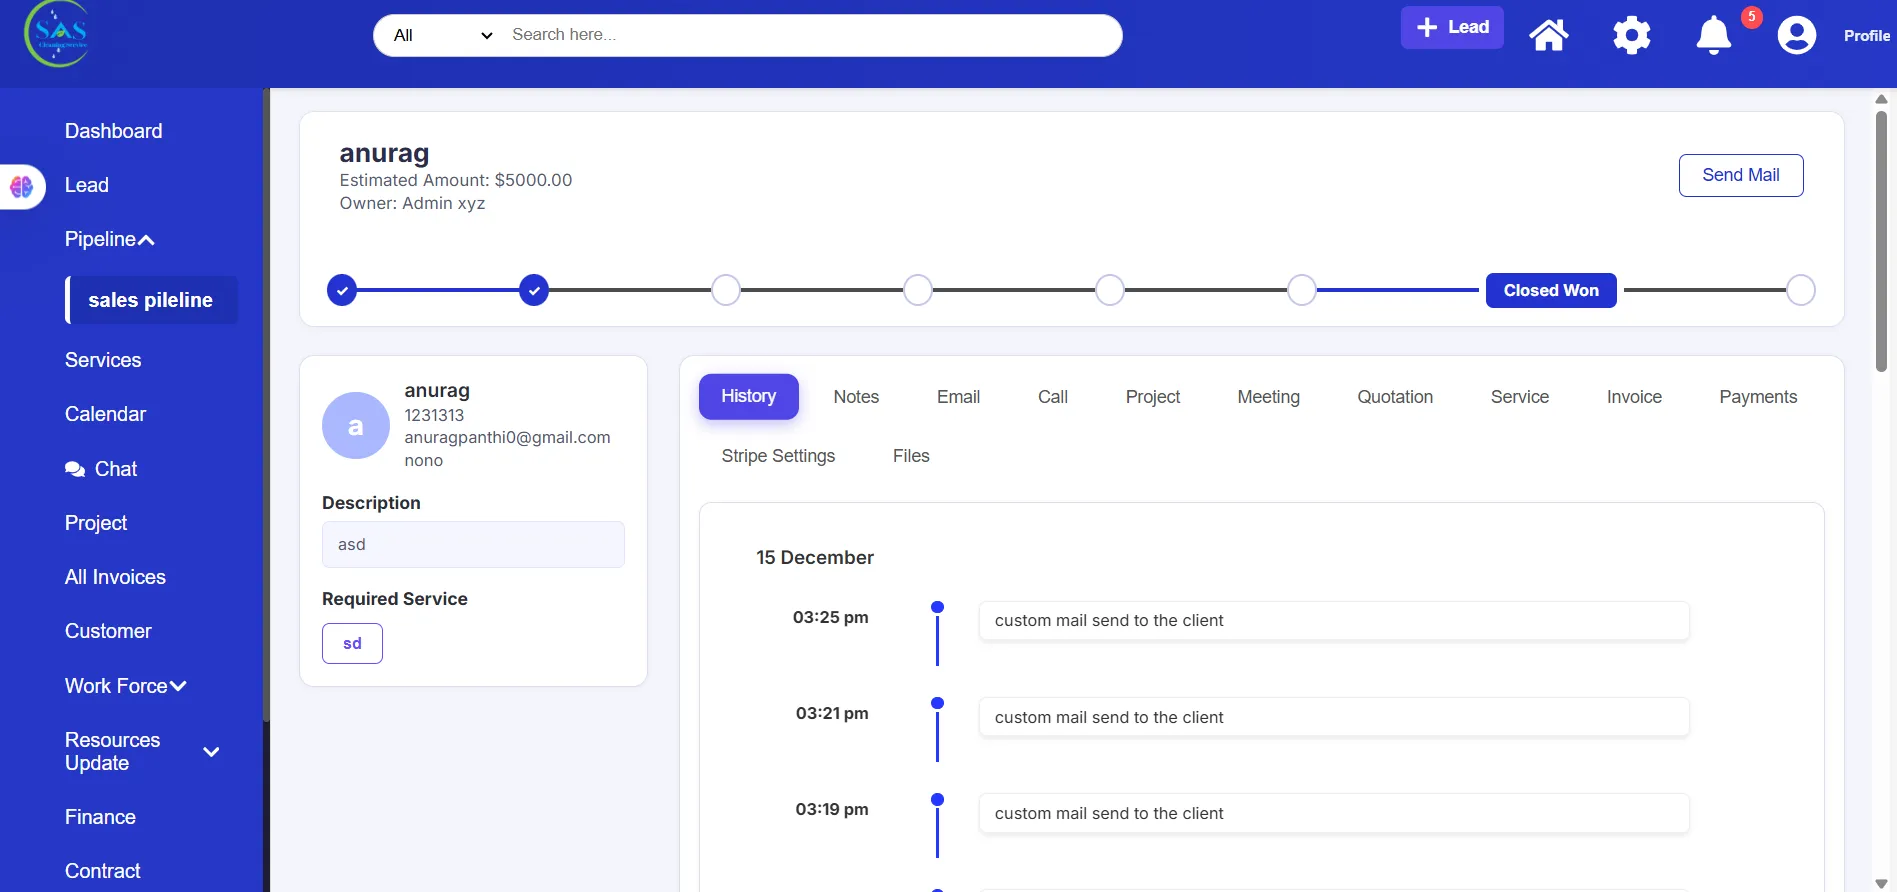
3. Sales Pipeline
The Sales Pipeline helps you manage customer communication and convert leads into active projects.
A. Interaction History
All communication is stored in one place, including:
- Calls
- Emails
- Meetings
- Internal notes
This keeps customer conversations organized and easy to review.
B. Meeting Notes
You can record important discussions such as:
- Cleaning requirements
- Pricing conversations
- Site inspection notes
- Special customer requests
Keeping detailed notes helps your team stay aligned.
C. Quotations & Service Agreements
You can create and send documents directly from the customer profile, including:
- Quotations
- Service agreements
- Contracts
This helps speed up the approval process and keeps records organized.
4. Services Catalog
The Services Catalog works as your company’s service menu and pricing system.
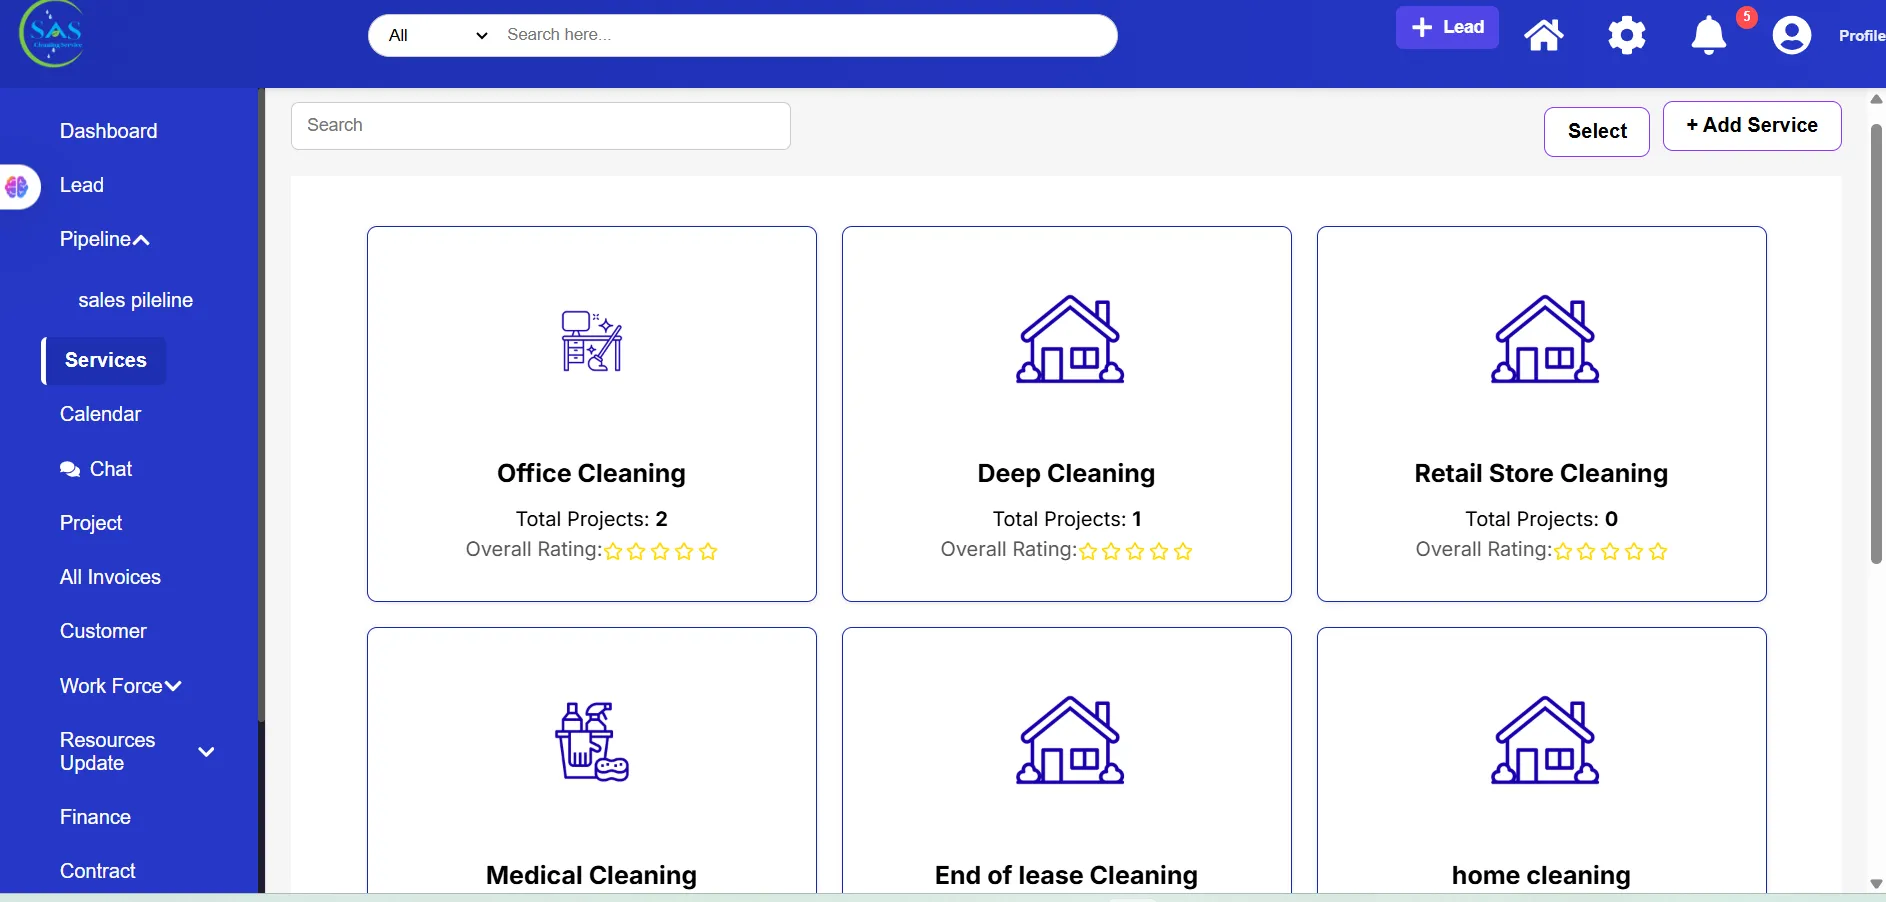
Manage Services
You can:
- Add new services
- Edit existing services
- Remove outdated services
Example Services
- Residential Cleaning
- Commercial Cleaning
- Carpet Cleaning
- Deep Cleaning
Service Details
For each service, you can define:
- Pricing rates
- Unit measurements
- Service descriptions
This helps maintain consistent pricing across all projects.
5. Operations & Scheduling
This section helps you manage projects, schedules, and team coordination from one place.
A. Project Management
Project List
View all project statuses, including:
- Ongoing projects
- Pending jobs
- Completed projects
This makes it easier to monitor daily operations.
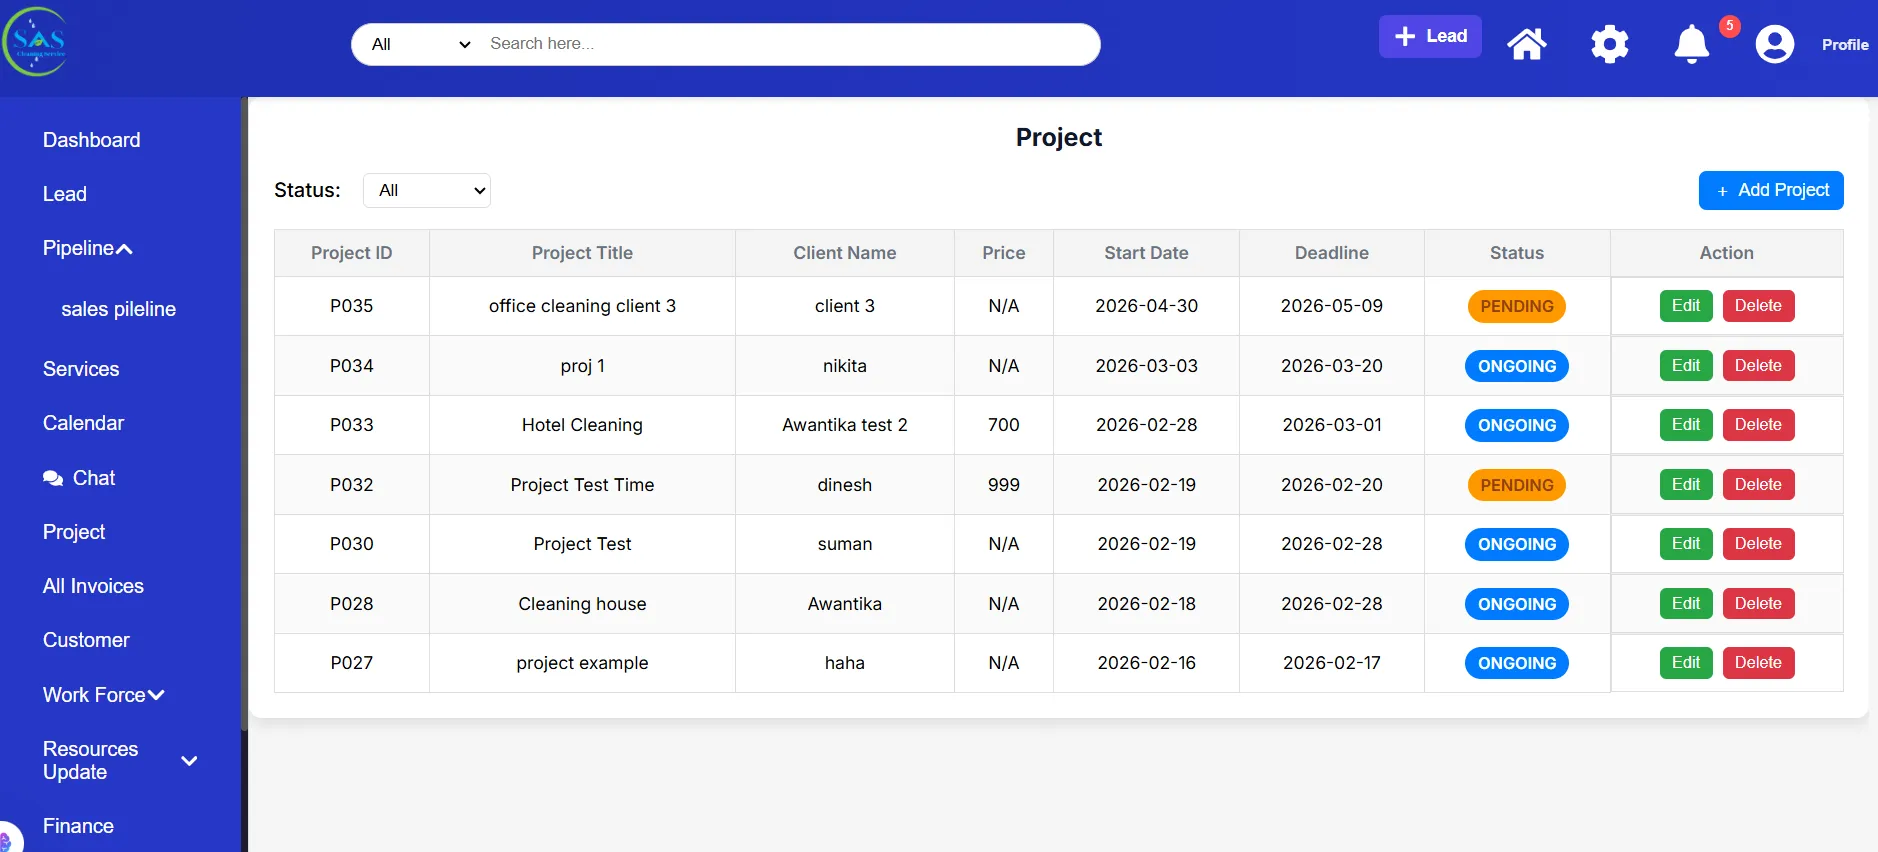
Create a Project
You can create projects by:
- Converting approved sales into projects
- Creating manual projects for one-time jobs
This gives you flexibility for different types of work.
B. Unified Calendar
The calendar provides a complete scheduling overview for your business.
You can manage:
- Team schedules
- Staff shifts
- Project deadlines
- Company events
Everything is visible in one centralized calendar.
C. Global Chat Hub
The chat system helps improve communication across teams.
Direct Messaging
Communicate directly with:
- Managers
- Cleaners
- Contractors
Project Group Chats
Admins can also monitor project discussions between managers and field teams.
This helps improve coordination and reduce communication gaps.
6. Workforce Management (HR)
Manage employee and contractor information from one centralized section.
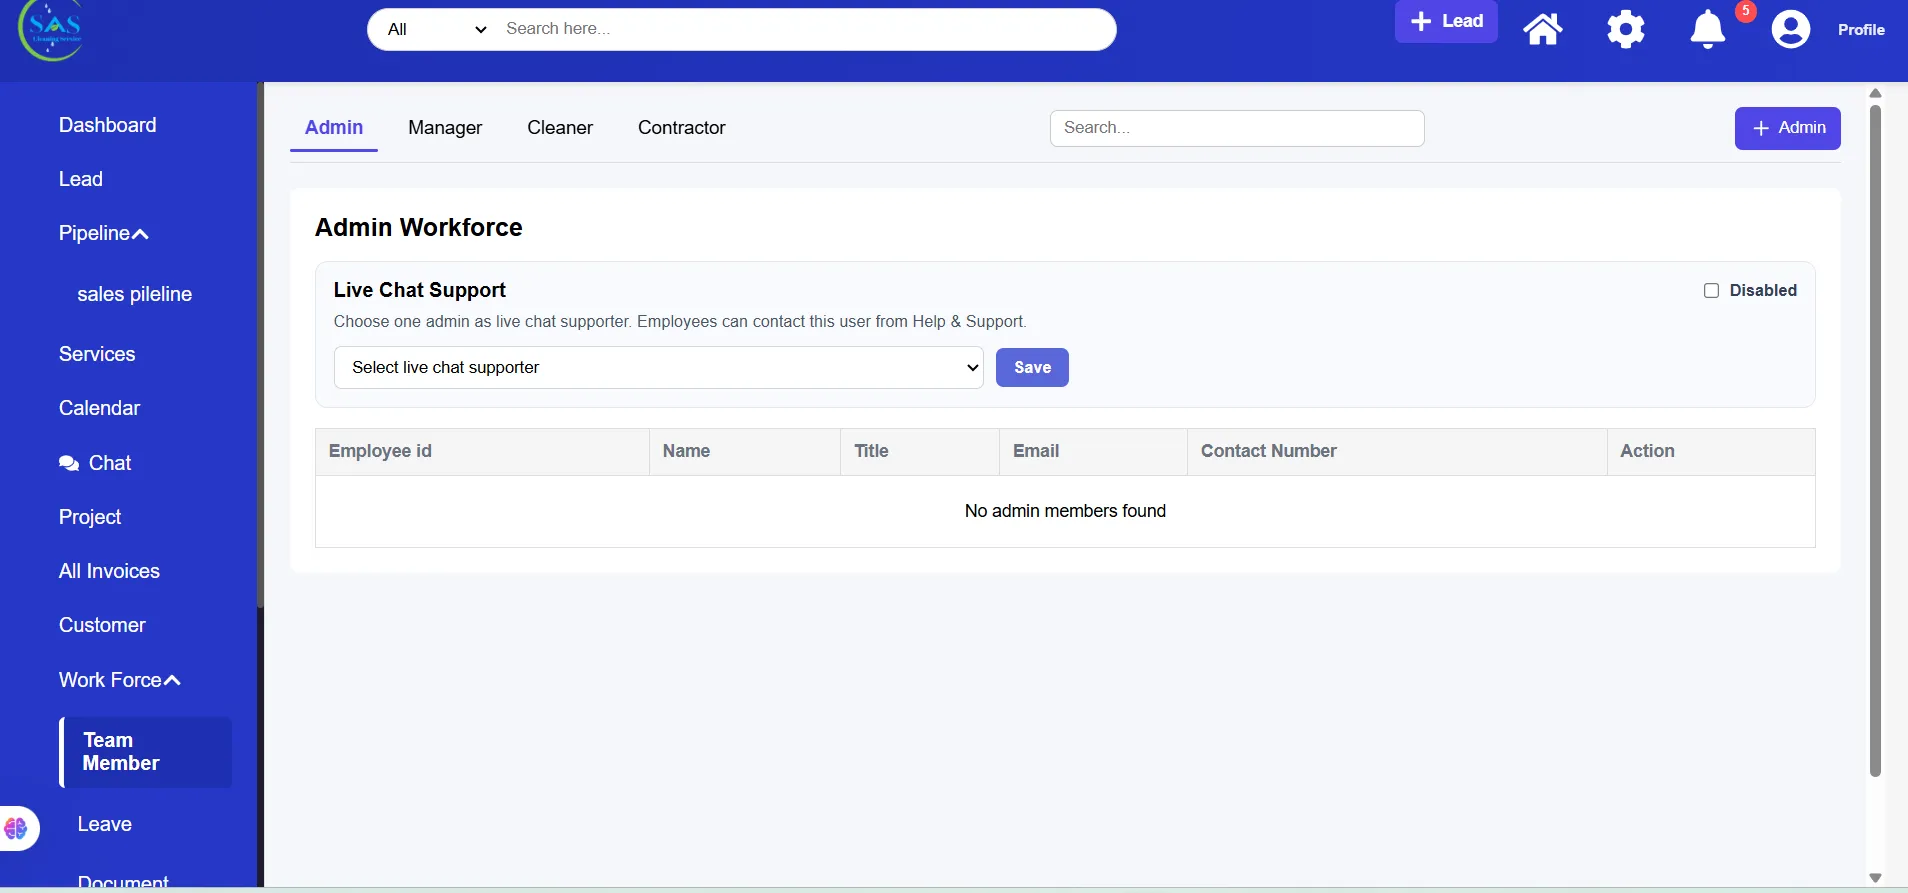
A. Team Directory
Staff List
View all company users, including:
- Admins
- Managers
- Cleaners
- Contractors
Add Team Members
When adding a new staff member, you can include:
- Contact information
- Role and permissions
- Bank details
- Employment information
Keeping records updated helps improve payroll and communication accuracy.
B. Leave Management
Review and manage leave requests submitted by staff members.
Available Actions
- Approve leave
- Reject leave
- Review leave history
This helps avoid scheduling conflicts.
C. Document Vault
Securely store employee-related documents such as:
- ID cards
- Certifications
- Background checks
- Training records
Keeping documents centralized makes compliance and verification easier.
7. Inventory & Resources
The Inventory section helps you manage cleaning supplies and equipment efficiently.
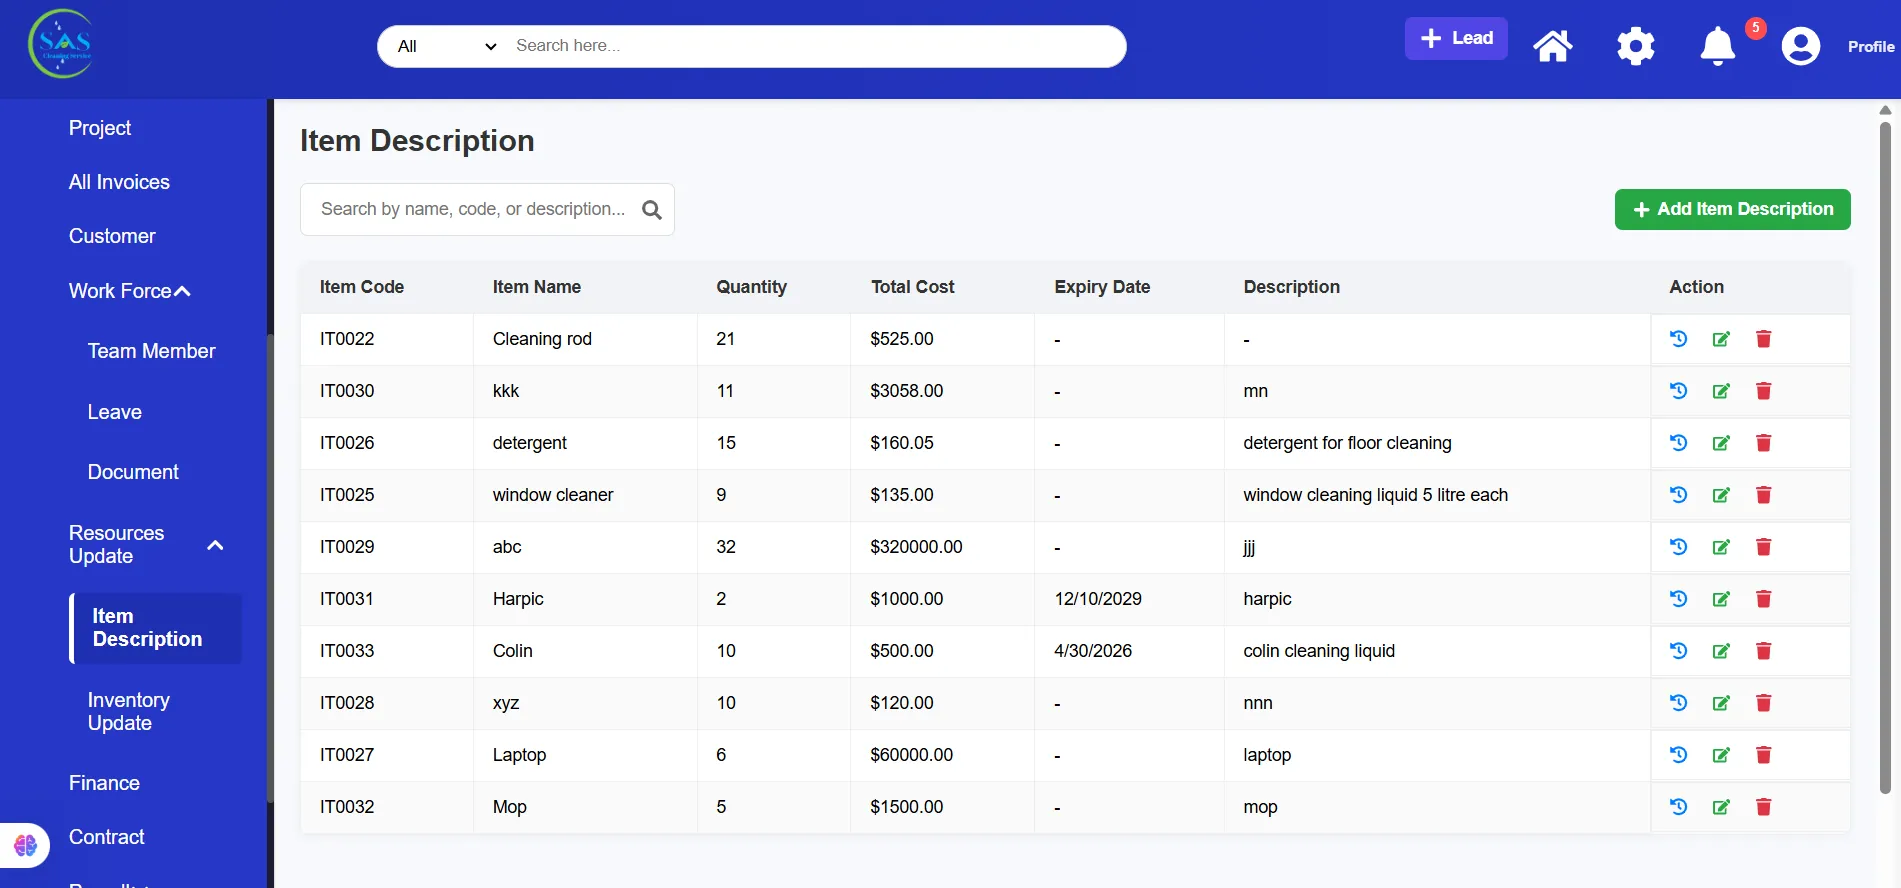
A. Inventory Dashboard
Track important inventory details, including:
- Available stock
- Product categories
- Unit prices
- Quantity levels
This helps prevent supply shortages during projects.
B. Resource Tracking & Updates
Restock Inventory
Add new stock whenever supplies arrive.
Project Usage Tracking
Monitor which supplies are being used for specific projects.
This improves inventory control and helps reduce waste.
8. Financials & Payroll
Manage company finances, invoices, payroll, and contractor payments from one place.
A. Finance Dashboard
Monitor key financial information such as:
- Income vs expenses
- Financial performance
- Project profitability
This helps you understand overall business growth and operational costs.
B. Invoicing & Contracts
Invoice Tracker
Track invoice statuses, including:
- Paid
- Unpaid
- Partial payments
Contract Archive
Securely store:
- Signed agreements
- Legal documents
- Client contracts
This keeps important business records organized and accessible.
C. Staff Payroll
Automatic Timesheets
Staff timesheets are automatically created using:
- Clock-in records
- Clock-out records
- Break tracking
Payroll Processing
Manage:
- Employee salary payments
- Contractor payouts
- Tax compliance requirements
Accurate time tracking helps ensure correct payroll processing.
9. Support & Training
The Support & Training section helps your team solve issues quickly and access helpful learning resources.
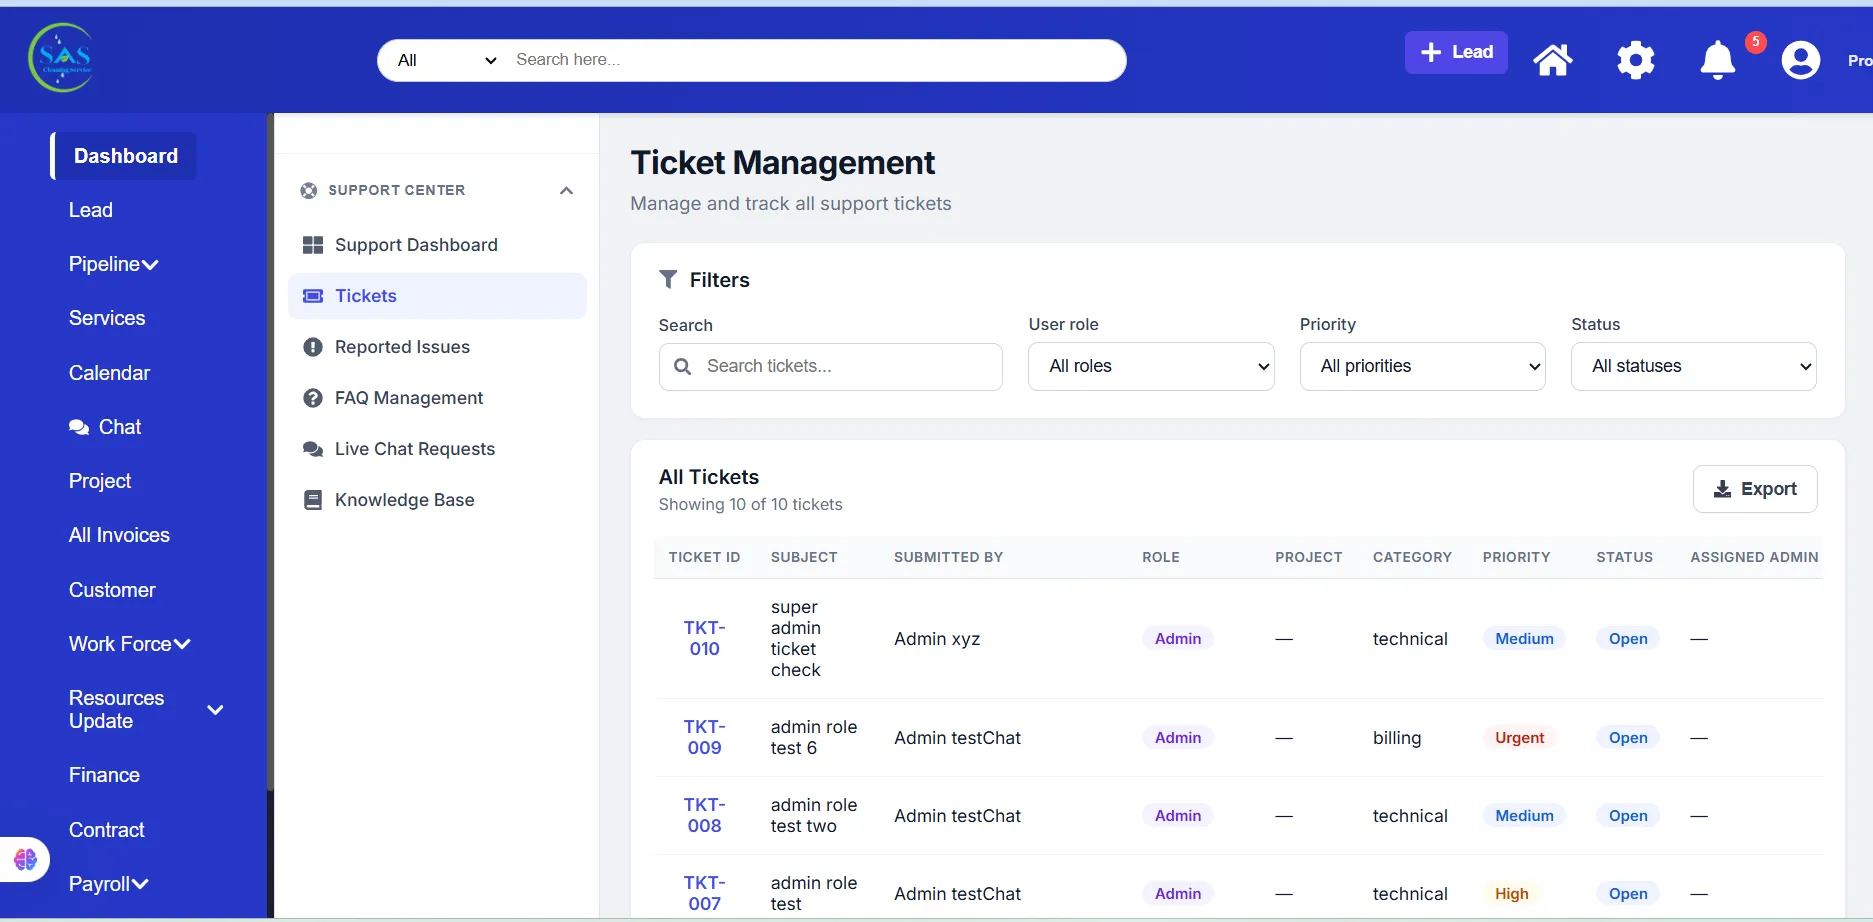
A. Support Dashboard
Manage support issues reported by:
- Clients
- Staff members
- Contractors
You can easily monitor ticket status and responses in one place.
B. Knowledge Base (FAQ)
Create and manage support articles to help users solve common problems independently.
Example Topics
- Clock-in assistance
- Payment guides
- Task management tutorials
A strong knowledge base reduces support requests and improves user experience.
C. Live Chat Requests
Respond to real-time questions from:
- Website visitors
- Mobile app users
- Clients
This helps improve customer response times and communication.
Admin Tip
If a cleaner or contractor cannot clock in through the mobile app, you can use the Manual Entry option inside Project Management to correct their time logs and ensure accurate payroll processing.
Daily Workflow Example
Here’s an example of a typical admin workflow:
- Review dashboard updates
- Check and verify new leads
- Move verified leads into the sales pipeline
- Create or manage projects
- Assign managers and staff
- Monitor schedules and team activity
- Track inventory and resource usage
- Review financial reports and invoices
- Respond to support requests and approvals
Following a structured workflow helps keep operations organized and efficient.
Best Practices for Admins
To keep operations running smoothly:
- Verify leads before creating projects
- Keep employee records updated
- Monitor project communication regularly
- Review inventory levels frequently
- Process payroll and invoices on time
- Organize contracts and financial documents properly
- Use the calendar to avoid scheduling conflicts
- Respond to support issues quickly
Consistent management helps reduce errors and improve team productivity.
Conclusion
The Admin Portal in SAS Cleaning Suite helps you manage your entire cleaning business from one centralized platform.
With the Admin Portal, you can:
- Organize projects and schedules efficiently
- Manage staff, contractors, and operations
- Track inventory, finances, and payroll
- Improve communication across teams
- Monitor daily business performance in real time
By following this guide, you can streamline daily operations, reduce manual work, and keep your business organized, productive, and ready for growth.