Introduction
This guide explains how to start your shift, track your work time, take breaks, and submit your daily work report using the Cleaner Portal.
It is designed to be simple and easy to follow, so anyone can use it without technical knowledge.
What You Will Learn
In this guide, you will learn how to:
- Start your shift using Clock In
- Track your working time
- Take and manage breaks
- End your shift using Clock Out
- Fill and submit your work report
- Understand how your manager reviews your work
Complete Workflow Overview
Task Assigned → Clock In → Work & Breaks → Clock Out → Submit Report → Manager Approval → Timesheet Updated
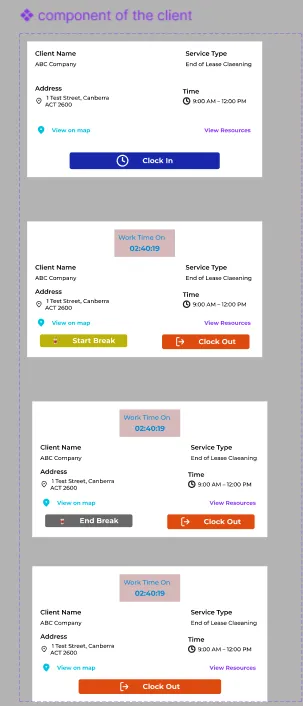
Phase 1: Starting Your Shift (Clock In)
When your manager assigns a task, it will appear on your Dashboard under “Today’s Task.”
Step 1: Clock In
- Go to your Dashboard
- Find your assigned task
- Click “Clock In”
This will start your work timer.
Step 2: Track Work Time
- After clocking in, a “Work Time On” timer will start
- This shows how long you have been working
Step 3: Take a Break (If Needed)
- Click “Start Break” when you take a break
- Click “End Break” when you return
Your work timer will pause and resume automatically.
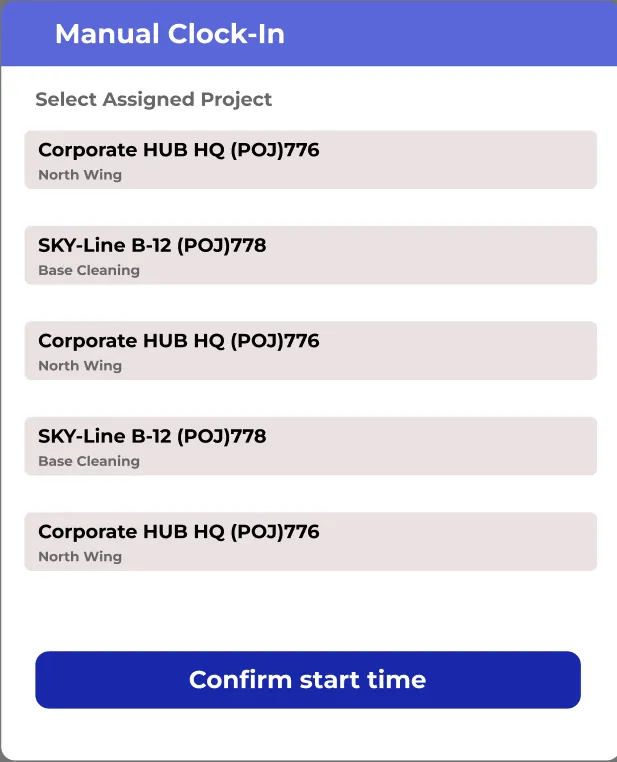
Step 4: Manual Clock In (If Needed)
If the normal clock-in doesn’t work:
- Click “Clock In Now (Manual Section Required)”
- Select your assigned project
- Click “Confirm Start Time”
Use this only if there is a technical issue.
Phase 2: Ending Your Shift (Clock Out)
Step 1: Clock Out
- After finishing your job
- Go to your Dashboard
- Click the orange “Clock Out” button
Step 2: Work Report Opens Automatically
- After clocking out, a Work Report form will open automatically
- You must complete this to finish your shift
Phase 3: Completing Your Work Report
The work report is very important. It shows what work you have done.
Step-by-Step Report Filling
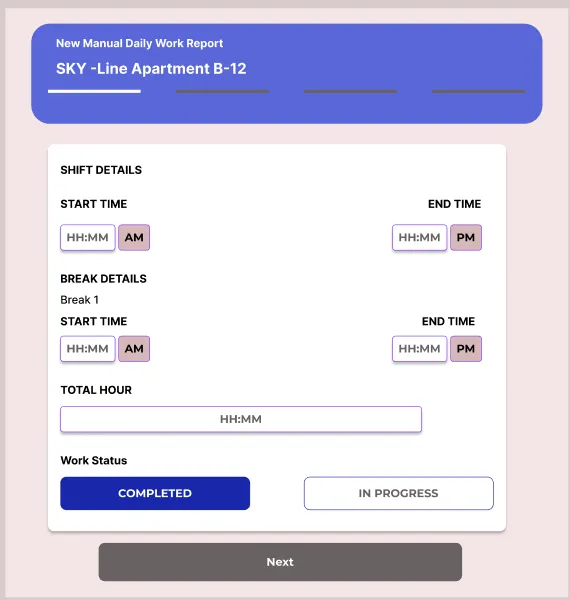
Step 1: Shift Details
Fill in:
- Start Time
- End Time
- Break Details
- Work Status (e.g., Completed)
This helps calculate your total working hours.
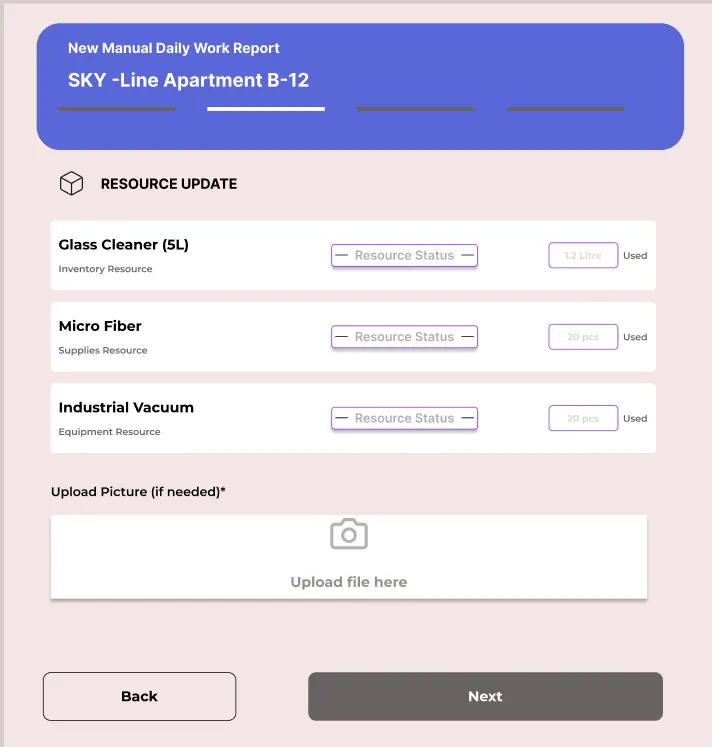
Step 2: Resource Update
Add details of materials used:
- Glass cleaner
- Microfiber cloth
- Vacuum or other tools
You can also upload photos if needed.
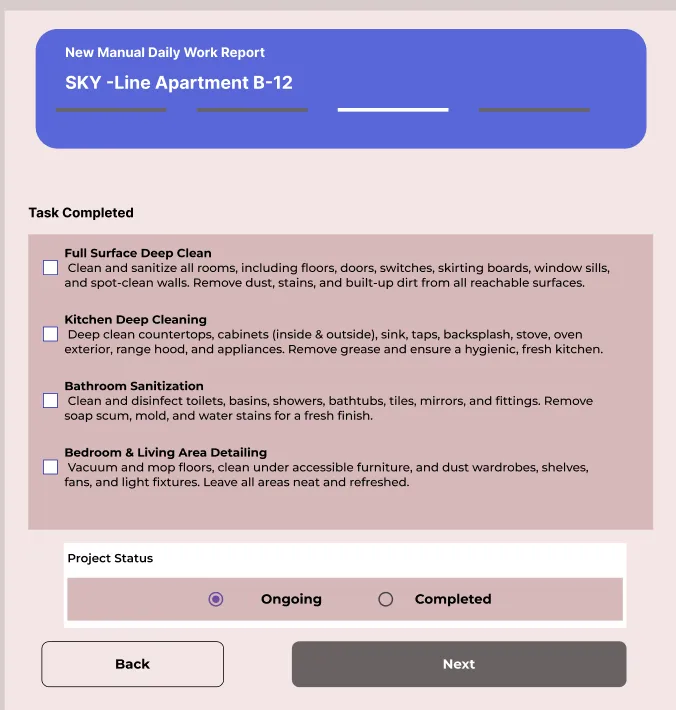
Step 3: Task Completed
Select the tasks you finished, such as:
- Deep cleaning
- Kitchen cleaning
- Bathroom sanitization
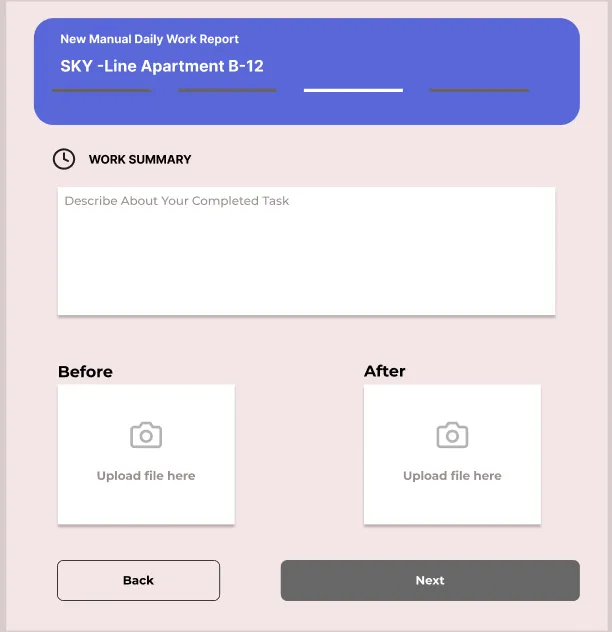
Step 4: Summary & Photos
- Write a short summary of your work
- Upload:
- Before photos
- After photos
Photos are required as proof of your work.
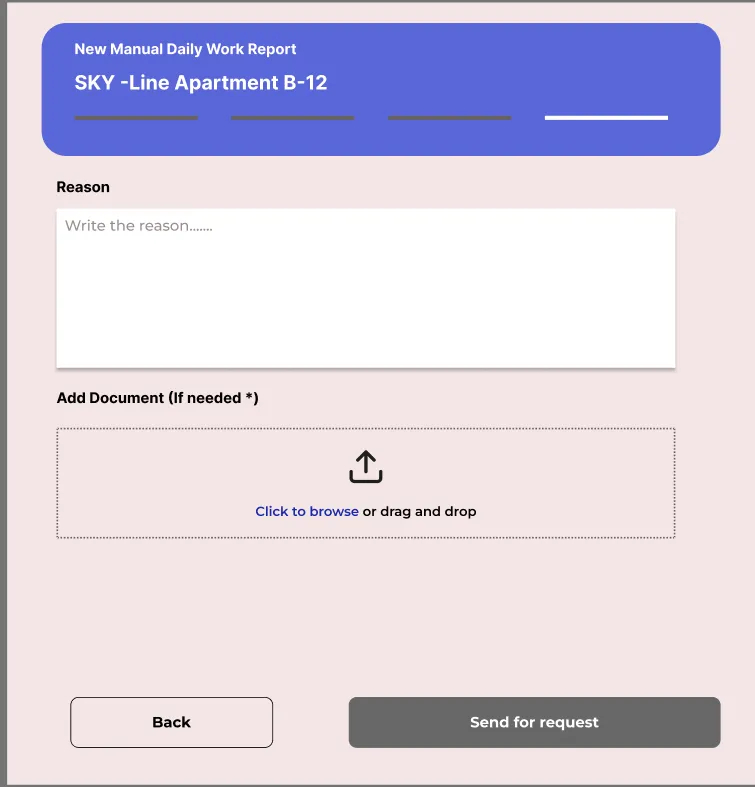
Special Case: Manual Report
If you used Manual Clock In:
- You must write a reason
- Explain why normal clock-in didn’t work
- Upload any proof if needed
Then click “Send Request”
Phase 4: Manager Approval & Timesheet Update
What Happens Next?
- Your report is sent to the manager
- The manager will:
Approve it
Or send it for inspection
Automatic Updates
Once approved:
- Your Timesheet is updated automatically
- Your total working hours are recorded
- Your performance report is updated
Daily Workflow Example
- Check your assigned task
- Click Clock In
- Do your work
- Take breaks if needed
- Click Clock Out
- Fill work report
- Submit report
- Wait for manager approval
Best Practices for Cleaners
✔ Always clock in before starting work
✔ Do not forget to clock out
✔ Take breaks properly using the system
✔ Fill the report completely
✔ Upload clear before/after photos
✔ Use manual clock-in only if necessary
✔ Submit your report on time
Conclusion
The Clock In, Clock Out & Work Report system helps you:
✔ Track your working hours correctly
✔ Show proof of completed work
✔ Ensure accurate payment
✔ Maintain professional work records
By following this guide, you can complete your tasks smoothly and avoid any issues.