Contractor Portal – Complete Support Guide
Introduction
The Contractor Portal in SAS Cleaning Suite helps you manage your daily cleaning work in one place. You can view assigned projects, track your time, communicate with managers, submit work reports, and monitor your payments.
This guide is designed to be simple, practical, and easy to follow — even if you are using the system for the first time.
What You’ll Learn
In this guide, you’ll learn how to:
- Accept and manage projects
- Track your working hours
- Communicate with managers and team members
- Submit work reports correctly
- Monitor payments and earnings
- Manage your schedule and availability
- Track supplies and request resources
How the Contractor Workflow Works
Most projects follow this workflow:
Project Request → Accept or Negotiate → Start Work → Track Time → Submit Report → Manager Review → Payment Processing
Understanding this process will help you complete jobs smoothly and avoid delays.
1. Dashboard (Your Main Control Panel)
The Dashboard is the first screen you see after logging in. It gives you a quick overview of your work, schedule, and earnings.
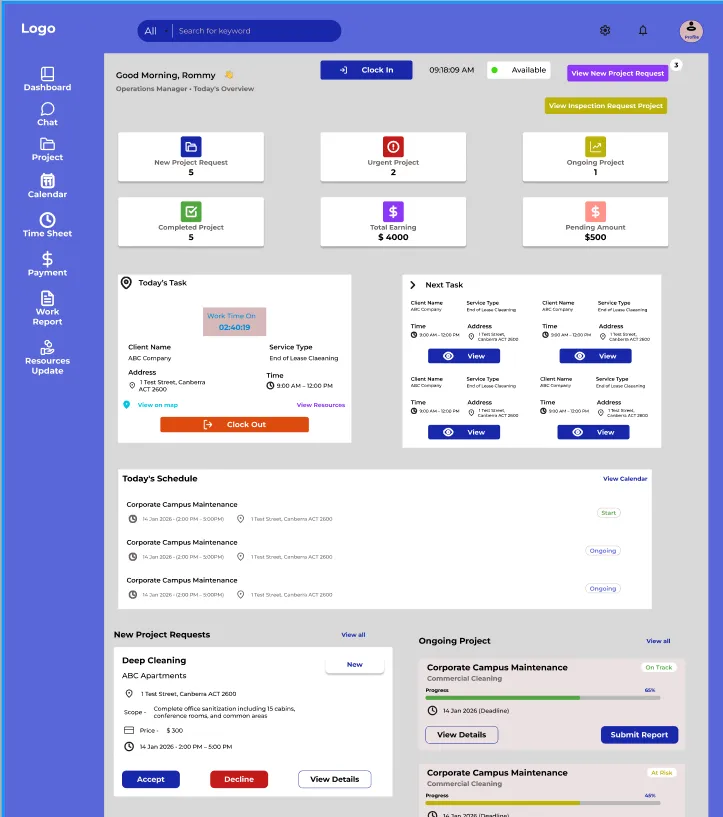
A. Project Overview
You can quickly see:
- New project requests
- Urgent projects
- Ongoing projects
- Completed projects
This helps you understand what needs attention right away.
B. Financial Overview
The financial section shows:
- Total earnings
- Pending payments
You can use this section to keep track of your income and outstanding payments.
C. Clock In / Clock Out (Hourly Work)
If you are paid hourly, you must track your work time properly.
To Start Working
- Click “Clock In”
- The system will start a work timer automatically
To Finish Working
- Click “Clock Out” when your work is completed
Always remember to clock out to ensure your hours are recorded correctly.
D. Manual Clock In (If Needed)
If automatic clock-in is unavailable:
- Click “Clock In Now (Manual Section Required)”
- Select your project
- Confirm your start time
Use manual clock-in only when necessary.
E. Performance Tracking
The dashboard also displays your performance information, including:
- Total completed projects
- Overall rating (5-star system)
Maintaining strong performance can help improve future project opportunities.
2. Chat (Team Communication)
The Chat feature helps you stay connected with managers, office staff, and team members.
A. Project Group Chat
Each project automatically includes a group chat with:
- Managers
- Contractors
- Cleaners
Use the group chat for:
- Task updates
- Work questions
- Schedule coordination
- Project-related communication
Keeping communication inside the system helps everyone stay informed.
B. Direct Messaging
You can also send private messages to:
- Project managers
- Office/Admin staff
Direct messages are useful for personal questions or administrative concerns.
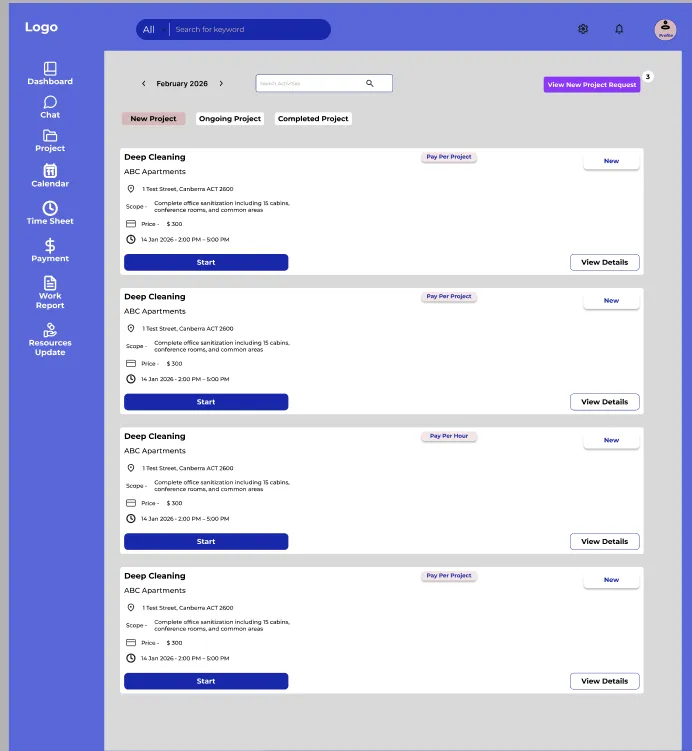
3. Project Management
The Project Management section is where you manage all assigned work.
A. Project Status Tabs
Projects are organized into categories:
- New Project Requests
- Ongoing Projects
- Completed Projects
These tabs make it easy to track your work progress.
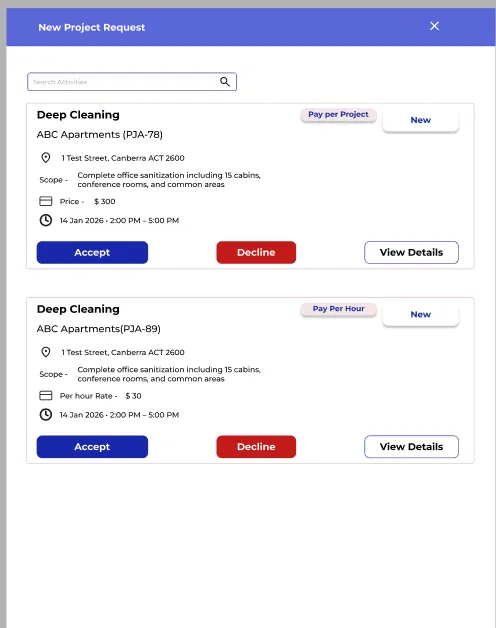
B. Accept or Decline Projects
When you receive a new project:
- Click “View Details”
- Review:
- Job details
- Location
- Schedule
- Requirements
- Choose one of the following:
- Accept → Start the project
- Decline → Reject the project
Always review project details carefully before accepting.
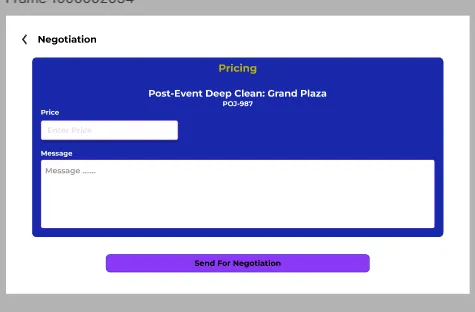
C. Negotiate Project Pricing
For fixed-price projects, you may negotiate pricing if needed.
To Send a Negotiation Request
- Click “Send for Negotiation”
- Enter your proposed price
- Submit the request
Wait for manager approval before starting work.
D. Track Project Progress
You can monitor project progress using:
- Progress percentage (%)
- Status indicators such as:
- On Track
- At Risk
- Behind Schedule
This helps you stay organized and complete work on time.
4. Calendar (Schedule Management)
The Calendar helps you manage your availability and assigned work.
A. Availability Colors
The calendar uses colors to show your schedule:
- Green → Available
- Red → Not Available
- Yellow → Assigned Task
B. Update Your Availability
You can:
- Add available dates
- Mark unavailable days
- Update multiple dates at once
Important
New availability updates will replace previous settings for those dates.
Keep your calendar updated to avoid scheduling conflicts.
5. Timesheet (Work Tracking)
The Timesheet section helps you review your work history and logged hours.
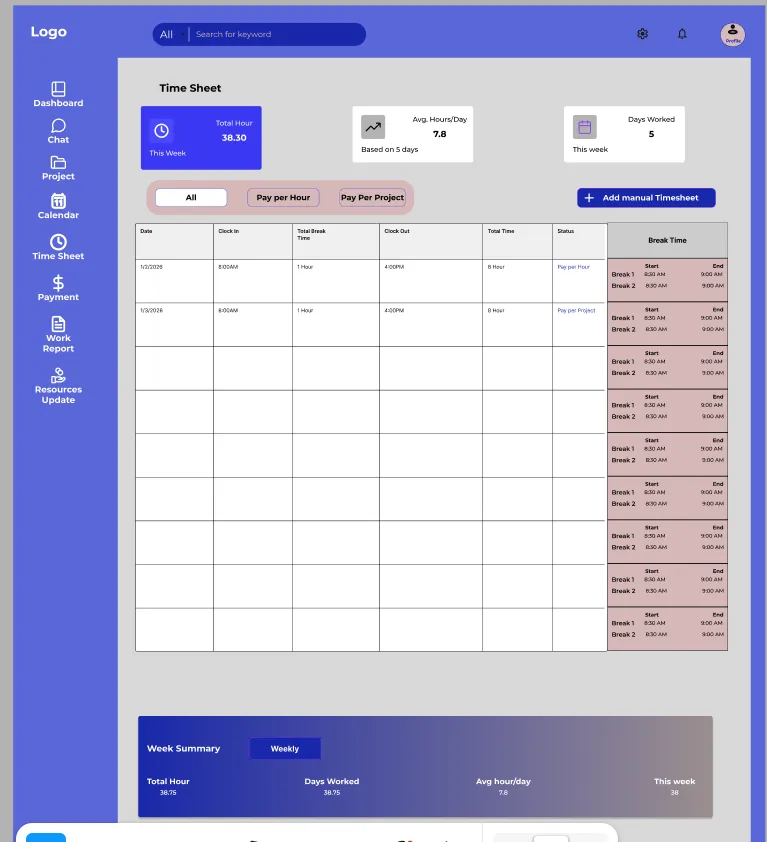
A. View Work Logs
You can check:
- Clock-in time
- Clock-out time
- Break durations
This helps ensure your recorded hours are accurate.
B. Filter Work Records
You can filter work logs by:
- Pay per Hour
- Pay per Project
This makes it easier to review specific jobs.
C. Weekly Summary
The weekly summary displays:
- Total hours worked
- Total working days
- Average hours per day
Use this section to monitor your workload and productivity.
6. Payments & Earnings
The Payments section helps you track invoices, completed payments, and pending amounts.

A. Financial Overview
You can view:
- Total payments
- Amount received
- Pending payments
- Overdue payments
- Partial payments
B. Payment Status
Each payment includes a status:
- Paid
- Pending
- Overdue
This allows you to quickly check the payment progress for each project.
C. Project Payment List
You can also review payment details for each project, including:
- Project ID
- Client name
- Payment status
D. Payslips
Payslips can be downloaded directly from the portal.
Payslips may include:
- Total hours worked
- Completed tasks
- Payment breakdown
- Earnings summary
Keep your payslips for your records.
7. Work Reports (Job Completion)
Submitting a work report is an important step. Your report confirms that the work has been completed and helps start the payment process.
How to Submit a Work Report
- Upload before-and-after photos
- Select completed tasks
- Enter work details
- Submit the report
Make sure your photos and notes are clear and complete.
Review Process
After submission, the manager may:
- Approve the report
- Request revisions
- Send the project for inspection
If revisions are requested, update the report and resubmit it as soon as possible.
8. Resources & Supplies Management
The Resources section helps you track cleaning supplies and request additional items when needed.
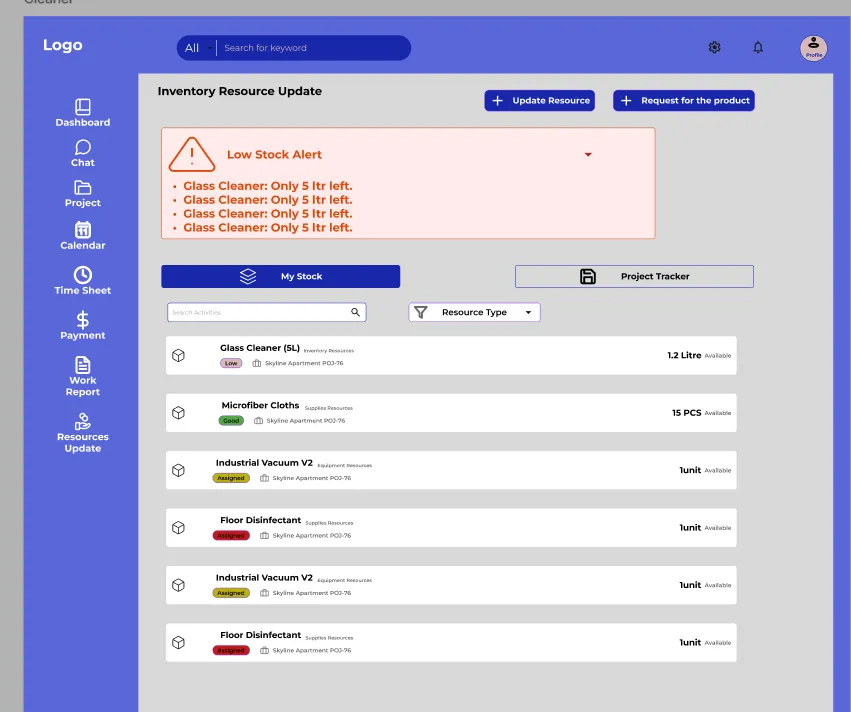
A. Low Stock Alerts
The system will notify you when supplies are running low.
B. Resource Tracking
You can view:
- Assigned supplies
- Used supplies
- Remaining inventory
This helps prevent shortages during projects.
C. Update Resource Usage
To update supplies used:
- Enter the quantity used
- Upload proof or photos if required
Always enter accurate information for proper inventory tracking.
D. Request Additional Supplies
If you need more materials:
- Click “Request Product”
- Submit the request
- Wait for manager approval
Daily Workflow Example
Here’s a simple example of a typical daily workflow:
- Check your Dashboard
- Review and accept new projects
- Clock in before starting work (if hourly)
- Complete assigned cleaning tasks
- Communicate through chat when needed
- Update resource usage
- Submit your work report with photos
- Wait for manager approval
- Track your payment status
Following this routine helps keep projects organized and payments on schedule.
Best Practices for Contractors
To work efficiently and avoid delays, follow these best practices:
- Always review project details before accepting work
- Discuss pricing clearly before starting fixed-price jobs
- Track your hours correctly for hourly projects
- Submit complete work reports with clear photos
- Keep your availability calendar updated
- Monitor payment statuses regularly
- Record supply usage accurately
- Use chat for important project communication
Good communication and accurate reporting help projects run smoothly.
Conclusion
The Contractor Portal is designed to help you manage your work more efficiently from start to finish.
With the portal, you can:
- Manage projects easily
- Track work hours and progress
- Communicate with your team
- Submit reports quickly
- Monitor earnings and payments
By following the steps in this guide, you can reduce confusion, stay organized, and complete projects more successfully every day.